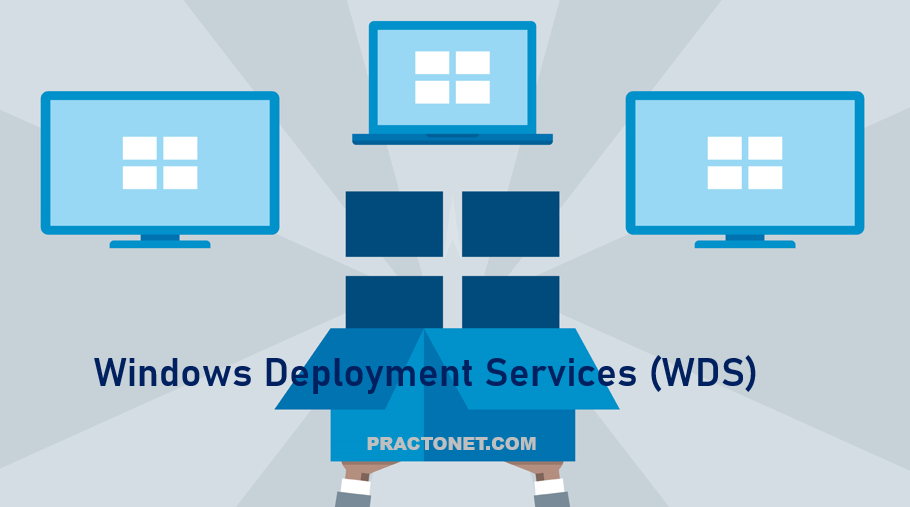
Windows Deployment Services (WDS) enables you to deploy Windows operating systems over the network, which means that you do not have to install each operating system directly from a CD or DVD.
WDS is a server role that enables you to remotely deploy Windows operating systems. You can use it to set up new computers by using a network-based installation. This means that you do not have to install each operating system directly from a CD, USB drive, or DVD. To use WDS, you should have a working knowledge of common desktop deployment technologies and networking components, including Dynamic Host Configuration Protocol (DHCP), Domain Name System (DNS), and Active Directory Domain Services (AD DS). It is also helpful to understand the Preboot eXecution Environment (also known as Pre-Execution Environment).
Benefits of Windows Deployment Services
- Allows network-based installation of Windows operating systems, which reduces the complexity and cost when compared to manual installations.
- Supports deploying images for mixed environments including Windows 7 and Windows Server 2008 R2 through Windows 8.1, Windows Server 2012 R2 and Windows 10 through Windows Server 2019.
- Uses standard Windows Setup technologies including Windows Preinstallation Environment (Windows PE), .wim files, and image-based setup.
- Transmits data and images by using multicast functionality.
- Allows you to create images of a reference computer using the Image Capture Wizard, which is an alternative to the ImageX tool.
- Allows you to add driver packages to the server and configure them to be deployed to client computers along with the install image.
- Install Windows Deployment Services (WDS)
- Configure WDS
- Add install image
- Add boot image
- Installation on Clients
Install Windows Deployment Services (WDS)
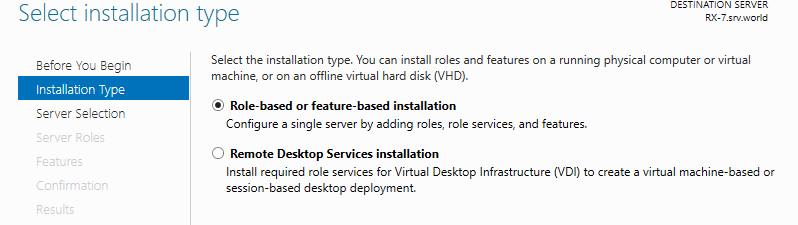
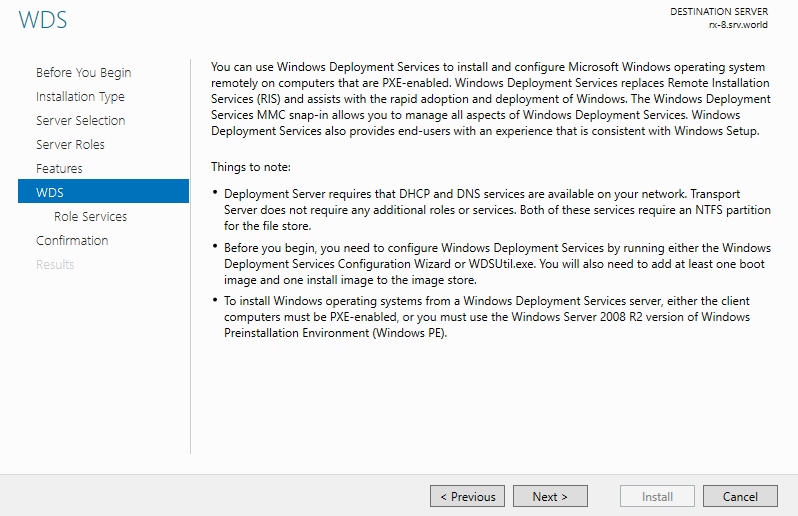
Step 1: Run Server Manager and Click Add roles and features and click Next on first page
Step 2: Select Role-based or feature-based installation.
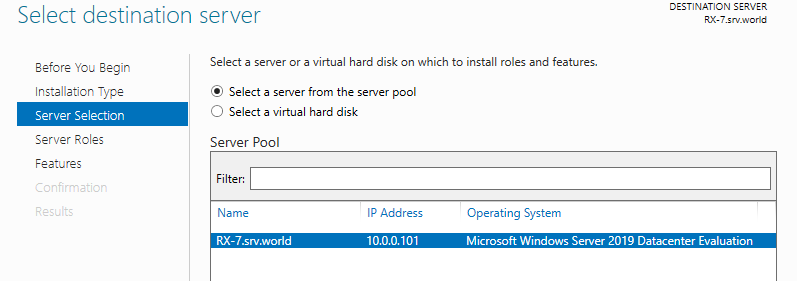
Step 3: Select a Host which you’d like to add services.
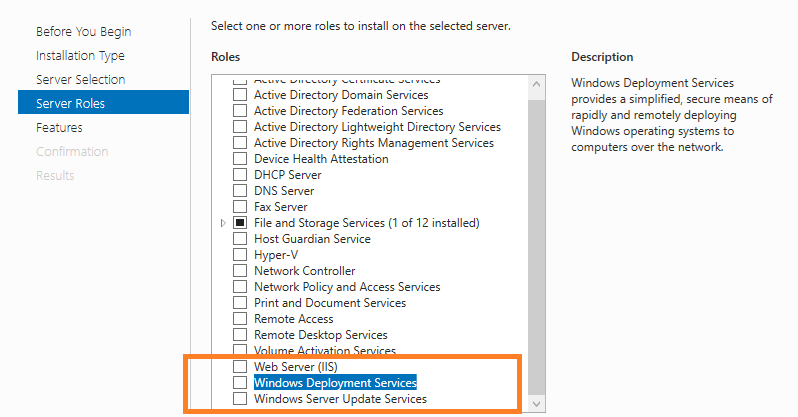
Step 4: Check a box Windows Deployment Services.
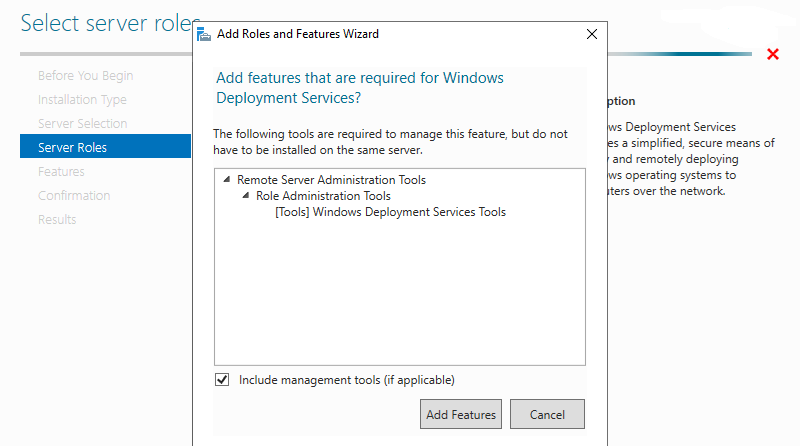
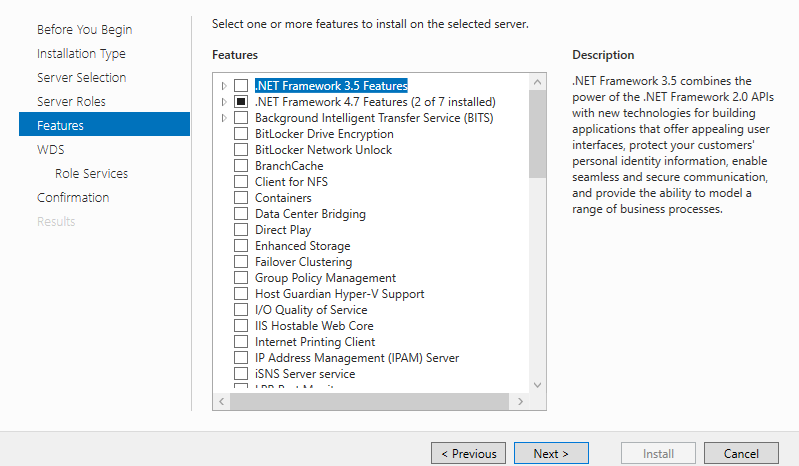
Step 5: Additional features are required to add WDS. Click Add Features button and then Click Next button.
Step 6: Click Next button.
Step 7: Click Next button.
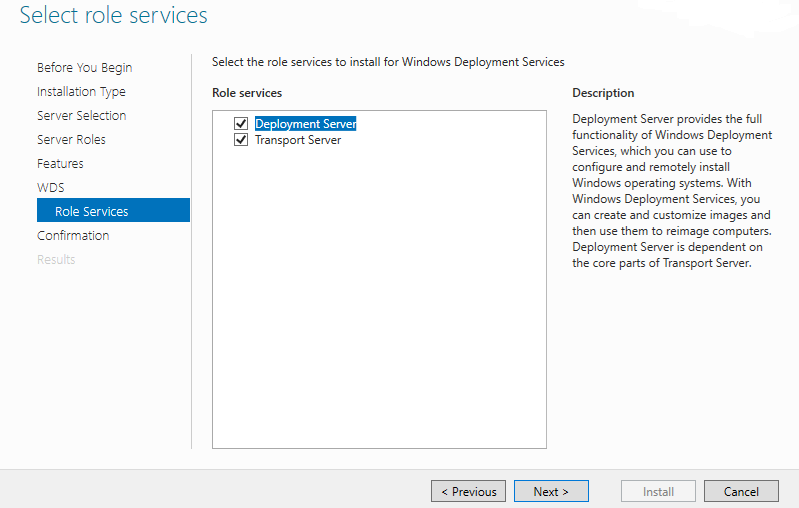
Step 8: Check boxes you’d like to install role services.
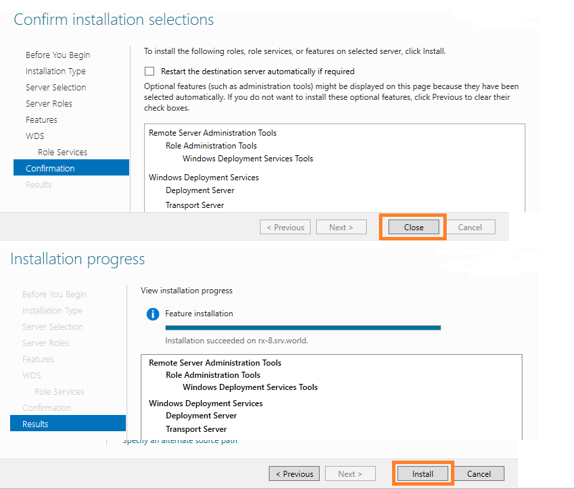
Step 9: Click Install button. After finishing Installation, click Close button.
Configure WDS
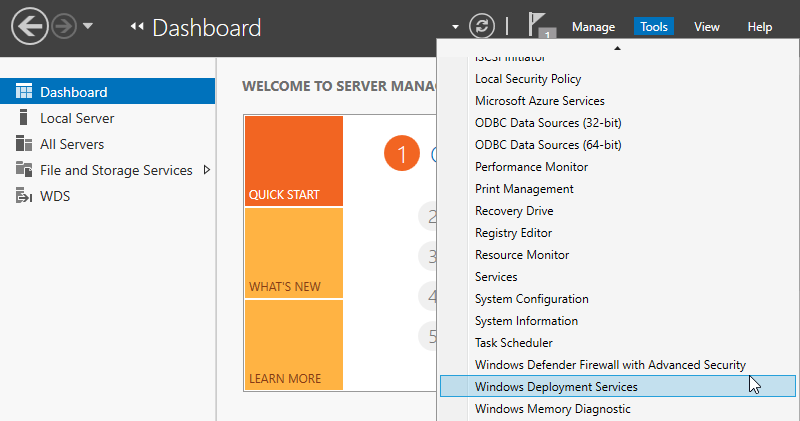
Step 1: Run Server Manager and select Tools -> Windows Deployment Services.
Step 2: Right click the computer name on the left pane and select Configure Server.

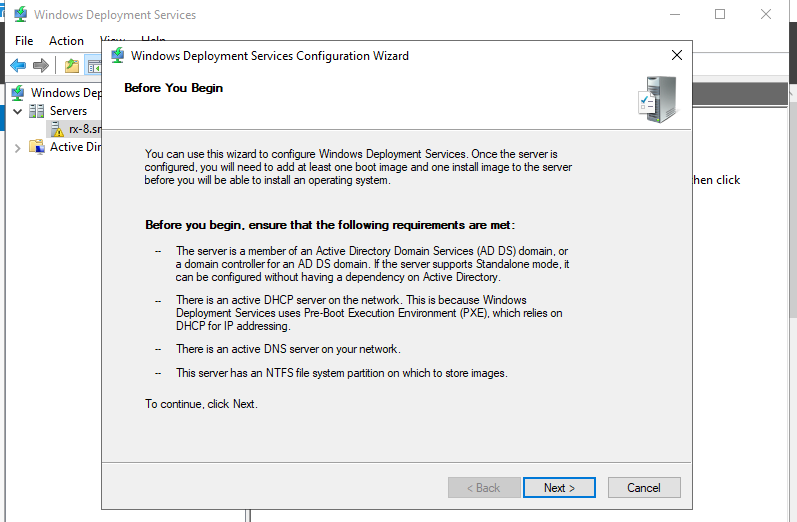
Step 3: Click Next button.
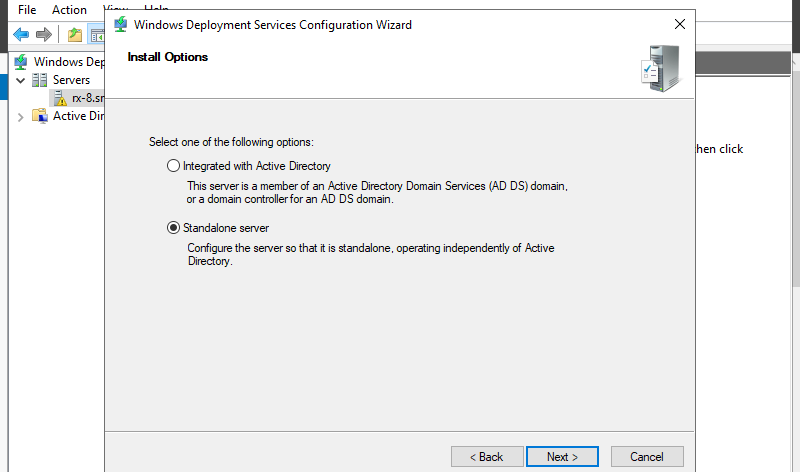
Step 4: Select the installaton options. It selects Standalone server on this example.
It’s no difference for WDS configuration procedure itself on both option.
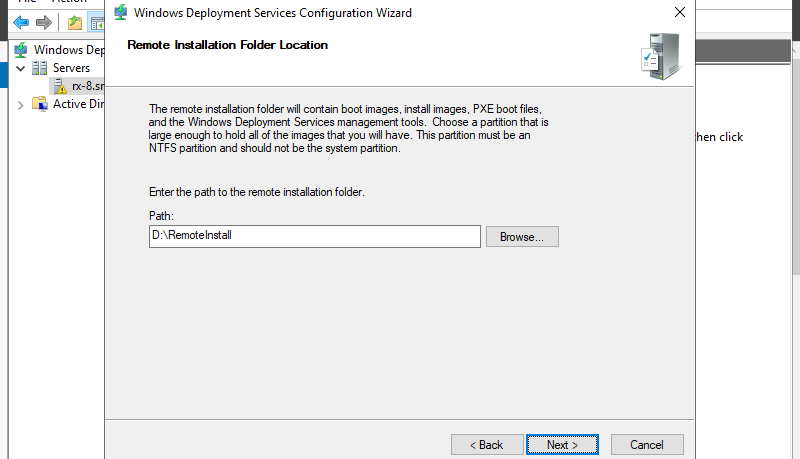
Step 5: Specify remote installation folder location.
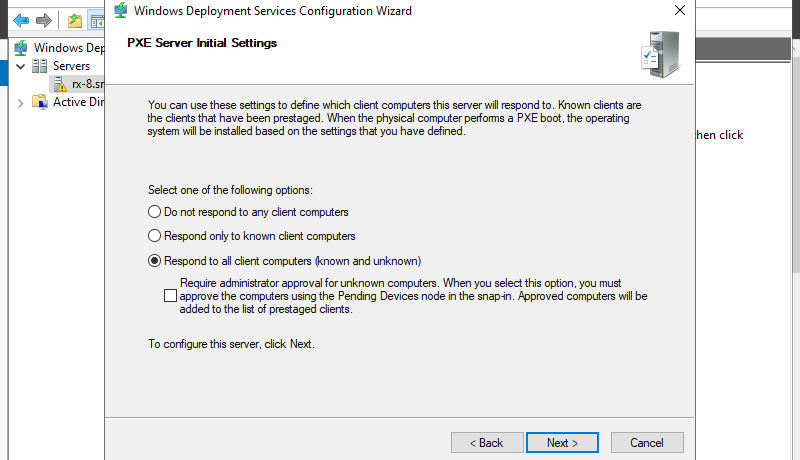
Step 6: Select a responding option for client computers. It selects Respond to all client computers on this example.
Step 7: Click Finish button to complete settings. For Add images to the server now option, it is checked by default but it proceeds with unchecking it on this example. (add them manually later) Anyway, if proceed with checking the box, the tasks Add install image and Add boot image are configured.
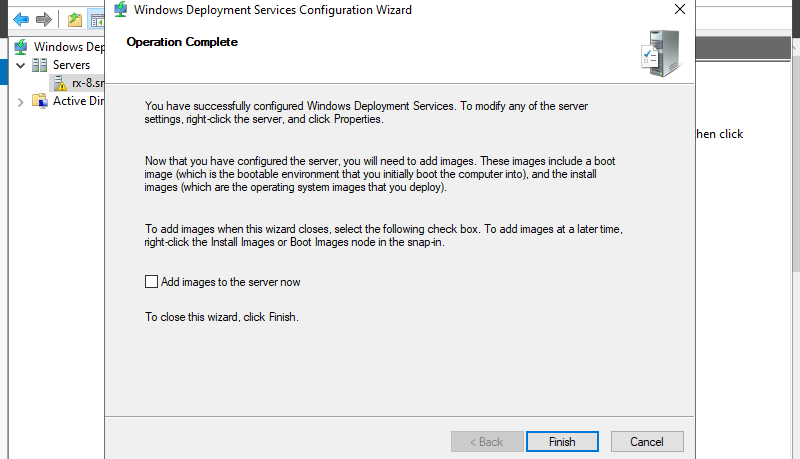
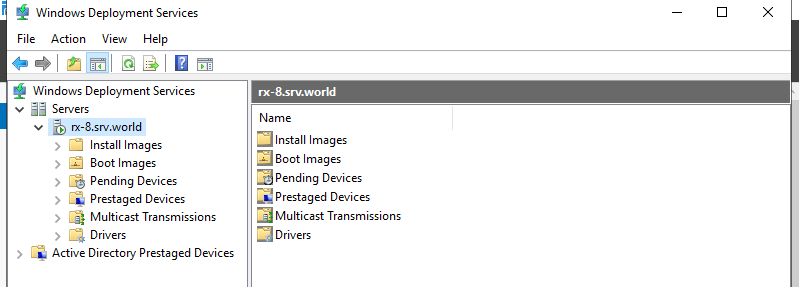
Step 8: After finishing initial server settings, some items are created under the server section.
Add Install image
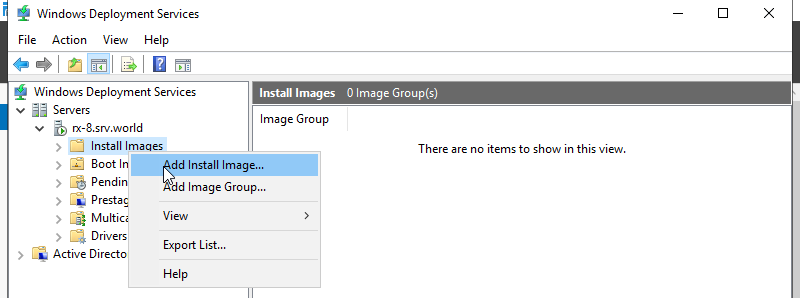
Step 1: Run Server Manager and select Tools -> Windows Deployment Services, then right-click the server name on the left pane and select Add Install Image.
Step 2: Set any image group name you like.

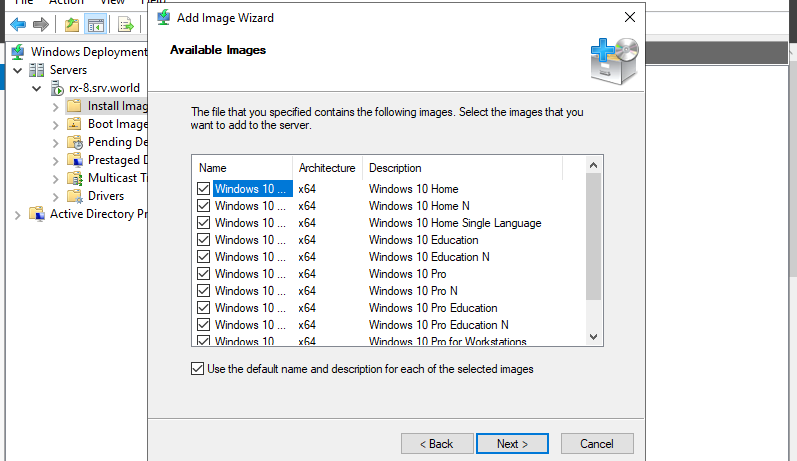
Step 3: Specify install image file. By default, install image is located at sources\install.wim.

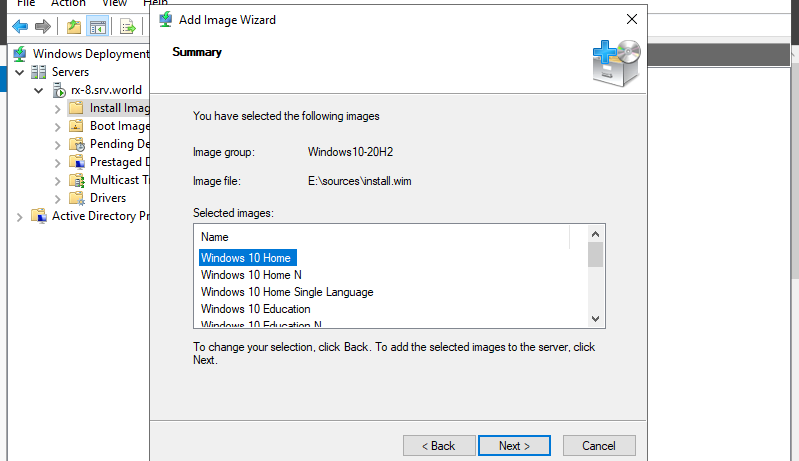
Step 4: If there are multiple images in the disk, it’s possible to choose images you’d like to add.
Step 5: Click Next button to begin to start the task of adding images.
Step 6: After finishing the task, Click [Finish] button.

Add Boot image
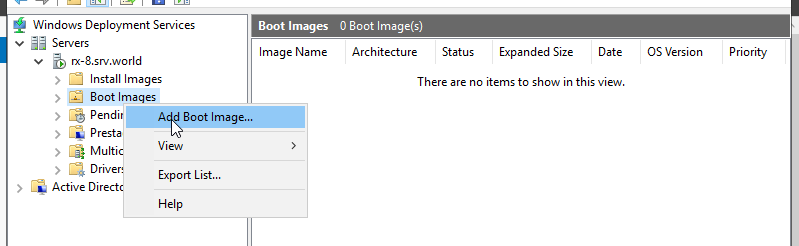
Step 1: Run Server Manager and select Tools -> Windows Deployment Services, then right-click the server name on the left pane and select Add Boot Image.
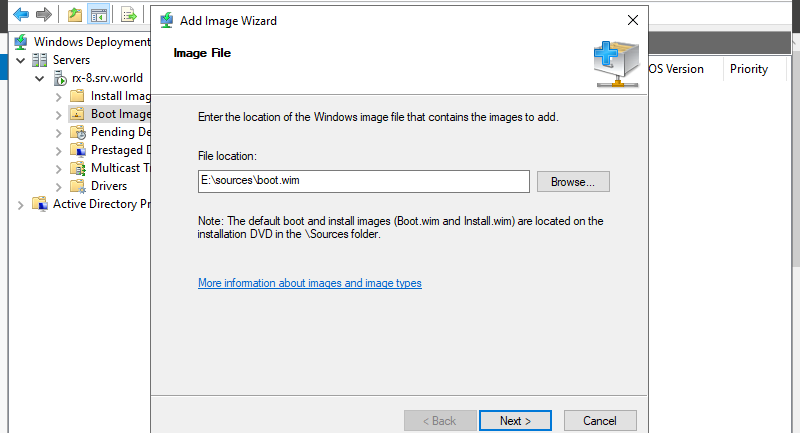
Step 2: Specify boot image file. By default, boot image is located at sources\boot.wim.
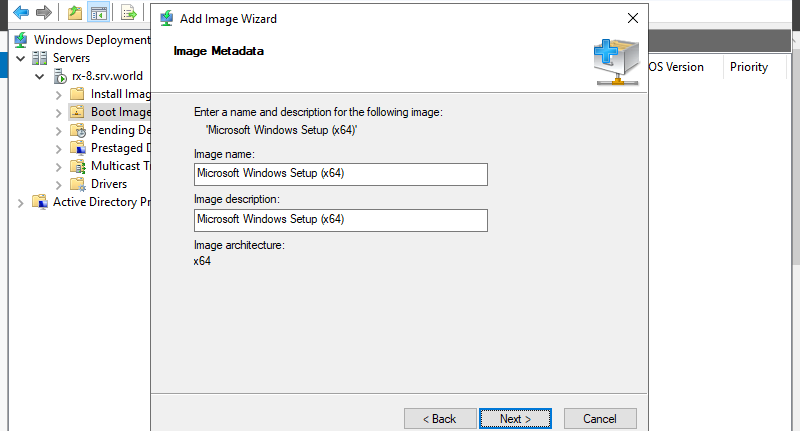
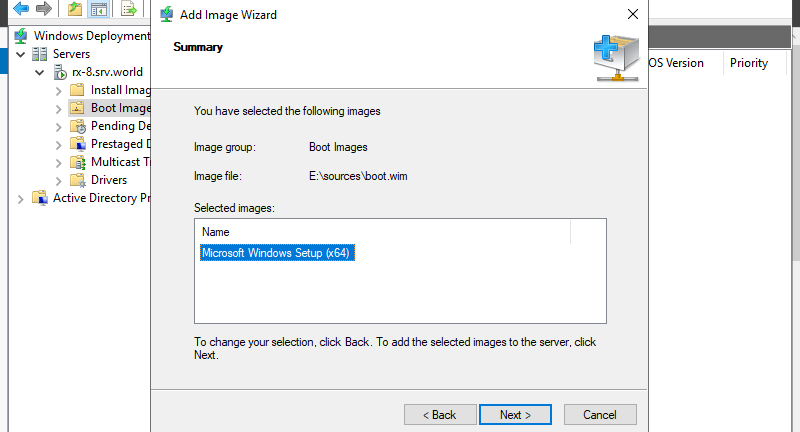
Step 3: Set image name and description you like and Click Next button..
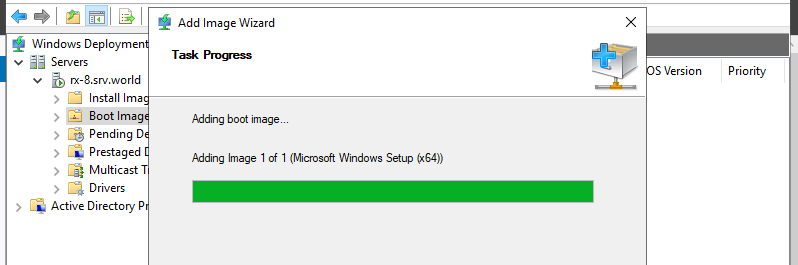
Step 4: Click Next button to begin to start the task of adding image.
Step 5: After finishing the task, Click Finish button.
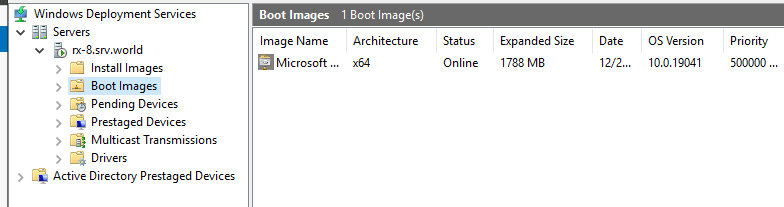
Step 8: It’s possible to confirm added images under the Boot Images section.
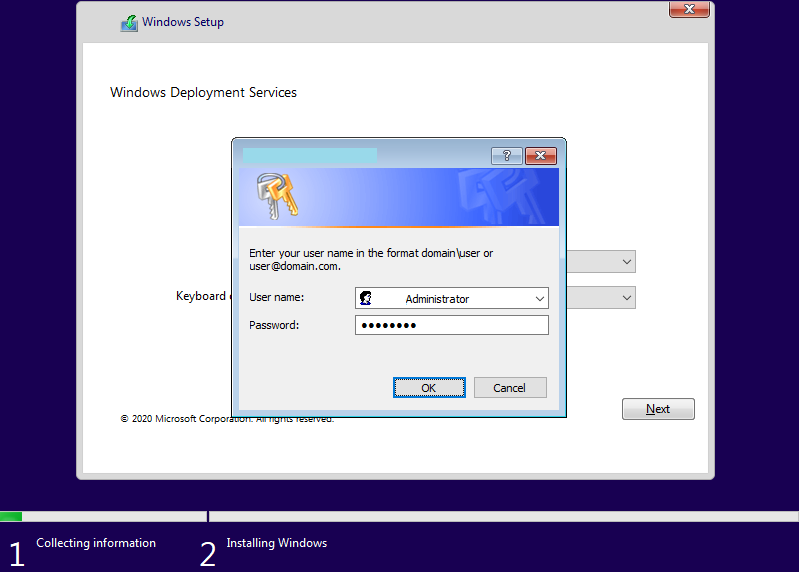
Installation on Clients
Step 1: Enable network booting on UEFI / BIOS settings of client computer and power on it, then WDS is respond like follows. On UEFI, push Enter key to proceed, On legacy BIOS, push F12 key to proceed.

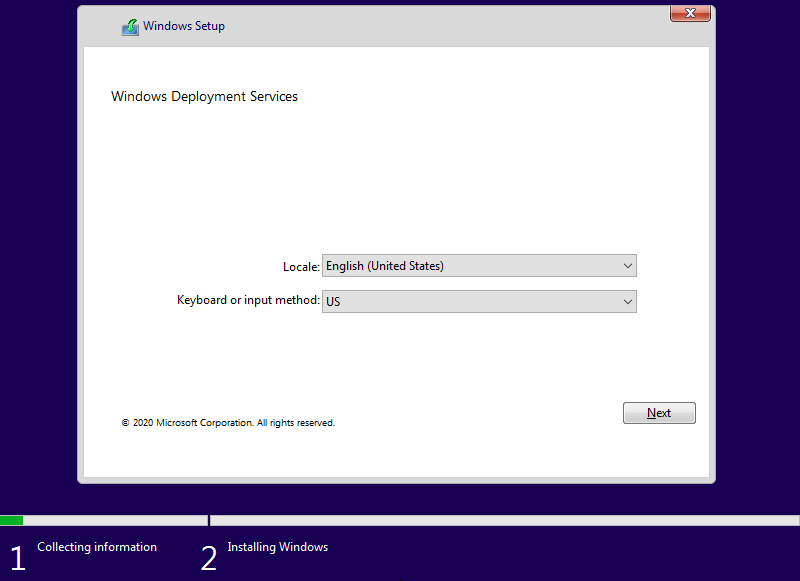
Step 2: Images are loaded from Windows Deployment Services.

Step 3: Installer starts. Click Next button.
Step 4: Authenticate with a user who has admin privilege on WDS server. After this, it’s the common installation processes.
Step 5: That’s OK if successfully installed and Windows starts normally.