A print server is a device that connects printers to client computers over a network by accepting print jobs from the computers and sending the jobs to the appropriate printers, queuing the jobs locally to accommodate the fact that work may arrive more quickly than the printer can actually handle it. Windows Print services support printing through SMB, LPD, IPP, and other protocols. Local printers are physically attached to the print server. Network printers are connected to the network and accessed through the printer driver loaded on the server. A printer pool is a single logical printer on the print server connected to multiple physical local or network printers. All printers in the pool must use the same printer driver. Printers and print jobs are managed using the Microsoft Management Console Print Management snap-in. Windows Print services supports installation of both 32-bit and 64-bit print drivers, allowing network clients to pull drivers from the print server when printing. The Internet Printing Protocol (IPP) provides a standard network protocol for remote printing and managing print jobs with support for access control, authentication, and encryption.
What Is Printer Pooling?
Printer pooling is a feature present in almost all latest versions of Microsoft Windows operating systems, and allows the printer administrators to create a single pool of multiple printers in order to reduce the workload from one printing device. When a printer pool is created, all the printing tasks are equally distributed among all the participating printers on round-robin basis. For example, if there are three printers configured to form a printer pool, the first printing task will be sent to the first printer, the second task will be sent to the second printer, the third printing task will be sent to the third printer, and the fourth printing task will be sent to the first printer again, and so on.
You create a printer pool on a server by specifying multiple ports for a printer. Each port is the location of one physical printer. In most cases, the ports are an IP address on the network, instead of a local LPT or USB connection.
What is Branch Office Direct Printing?
Branch Office Direct Printing reduces network costs for organizations that have centralized their Windows Server roles. When you enable Branch Office Direct Printing, Windows clients obtain printer information from the print server, but send the print jobs directly to the printer. The print data does not travel to the central server and then back to the branch office printer. This arrangement reduces traffic between the client computer, the print server, and the branch office printer, and results in increased network efficiency. Now lets go through how you as a Server Administrator can install & configure printer pool in windows Server 2019 for your infrastructure.
- Install Print Server
- Configure Print Server
- Branch Office Direct Printing
- Enabling Printer Pooling
- Add Printer in Client PC
Install Print Server
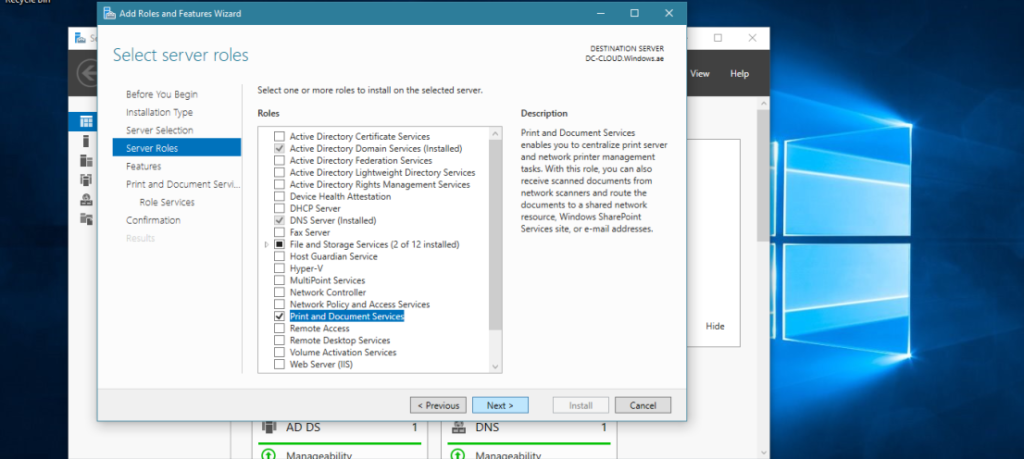
Step 1: Run Server Manager, click Add Roles & Features, then click Next, Next, Next (3 times). on the Select Server roles interface, click Print and Document Services and then click Next.
Step 2: On the Select Features interface, click Next.
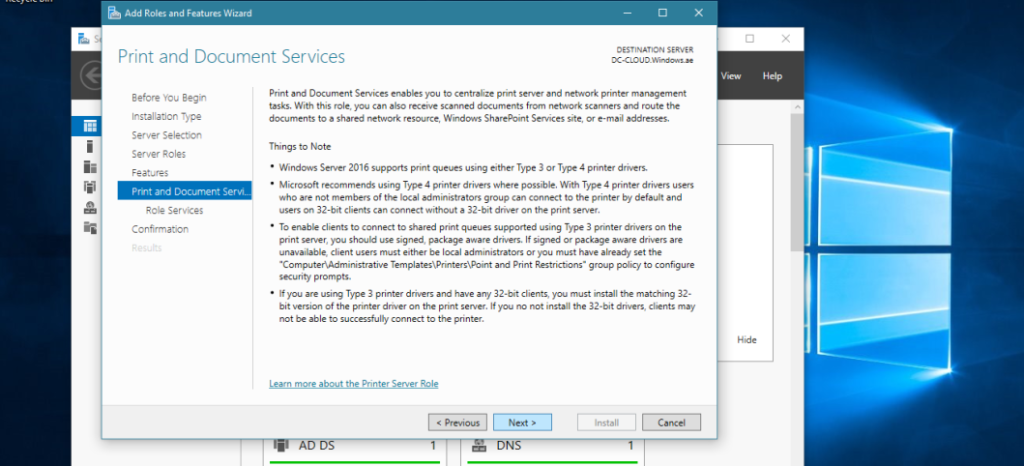
Step 3: On the Print and Document Services interface, click Next.
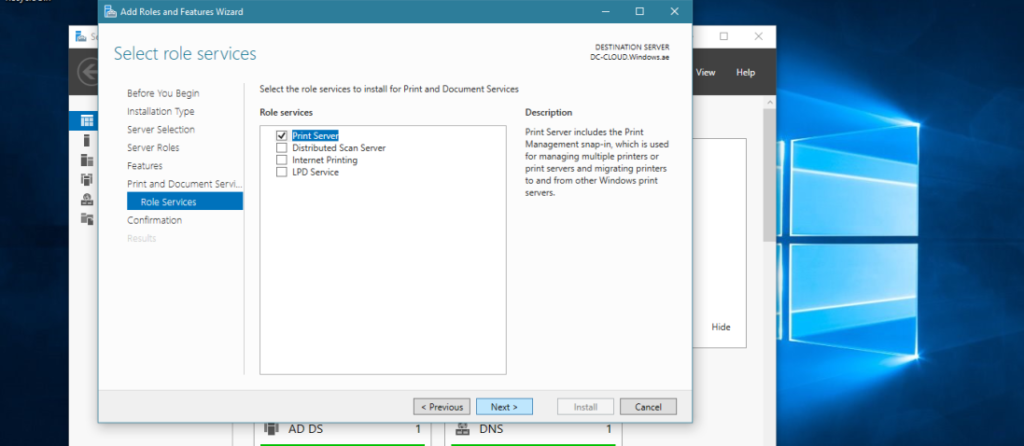
Step 4: On the Select role services interface, in the Role services verify that Print Server check box is selected and then click Next.
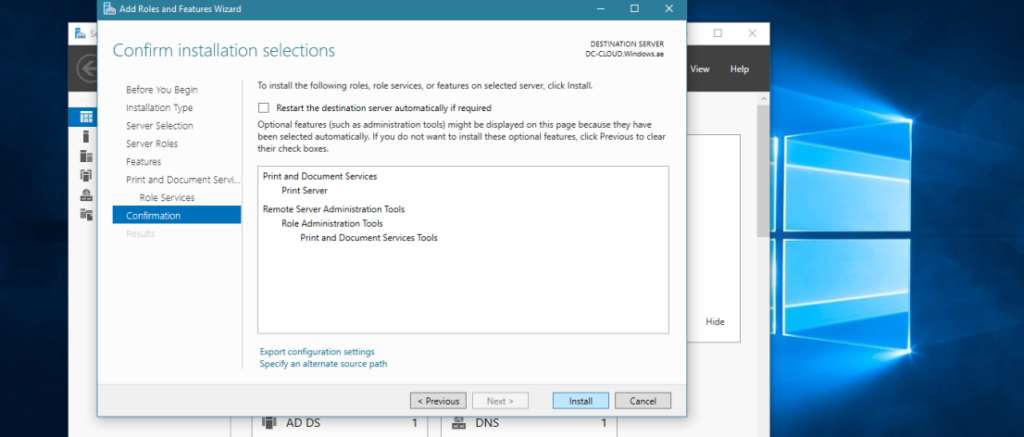
Step 5: In the Confirm Installation Selections interface, click Install.
Step 6: On the Installation progress interface, click close.
Configure Print Server
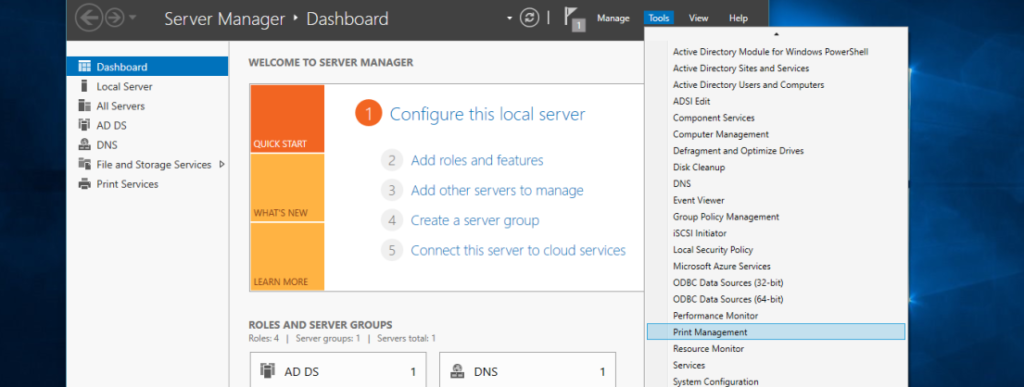
Step 1: Run Start -> Server Manager and Click Tools -> Print Management..
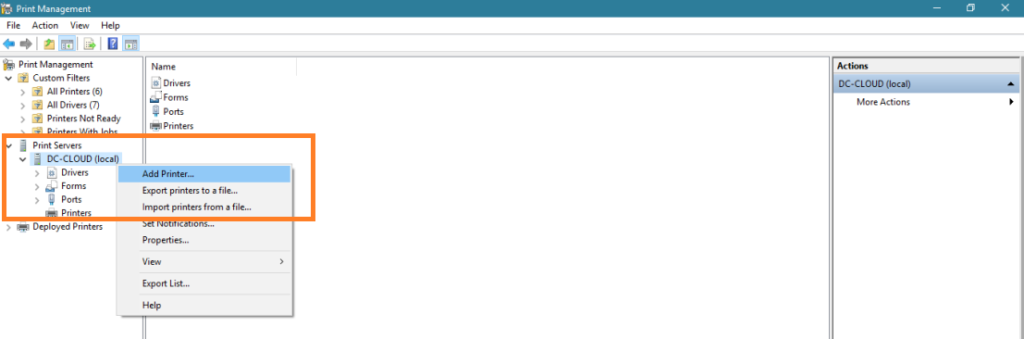
Step 2: Expand Print Servers, expand DC-CLOUD (local), right-click DC-CLOUD and then click Add Printer.
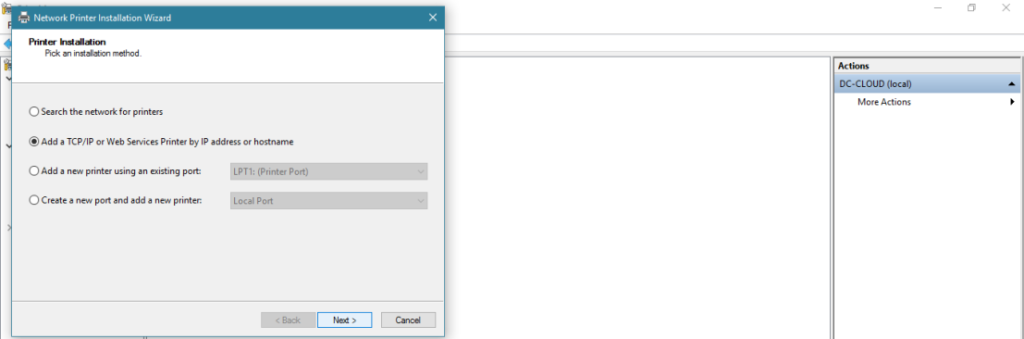
Step 3: On the Network Printer Installation Wizard interface, click Add a TCP/IP or Web Services Printer by IP address or hostname , and then click Next.
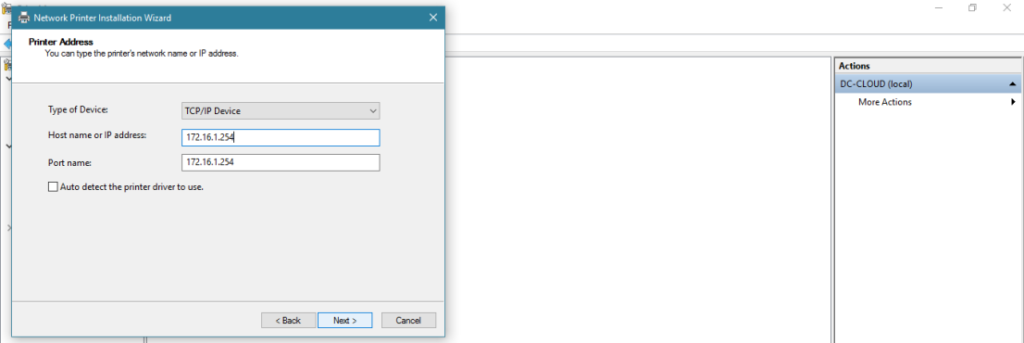
Step 4: On the Printer Address interface, change the Type of Device to TCP/IP Device, next in Host name or IP address, type 172.16.1.254, clear Auto detect the printer driver to use, and then click Next.
172.16.1.254 is just to simulate Network Printer IP Address. Use Ip address as per your IP configuration range.
Step 5: Under Device Type, click Generic Network Card, and then click Next.

Step 6: On the Printer Driver interface, click Install a new driver, and then click Next.
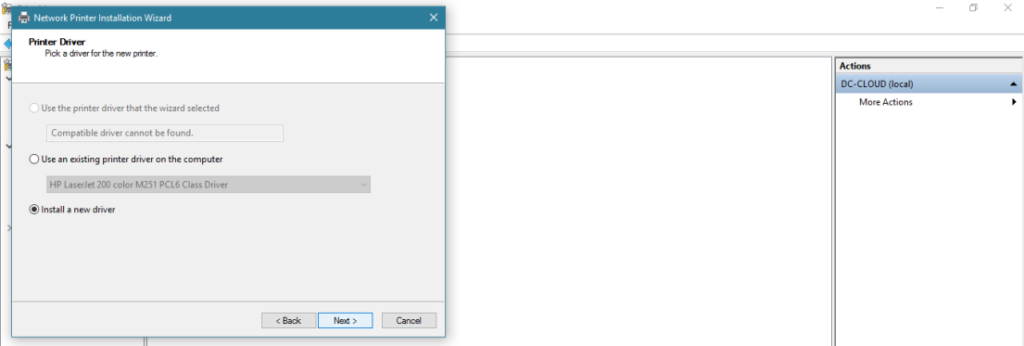
Step 7: On the Printer Installation interface, under Manufacturer, click Microsoft, under Printers, click Microsoft XPS Class Driver, and then click Next.
Note: I choose Microsoft OpenXPS Class Driver just to simulate the printer installation, in real production you should choose your own Printer manufacture and install driver.

Step 8: On the Printer Name and Sharing Settings interface, change the Printer Name to Windows Sales Printer, and then click Next.
Note: Give printer name that makes you easy distinguish where printer is located in network or department.
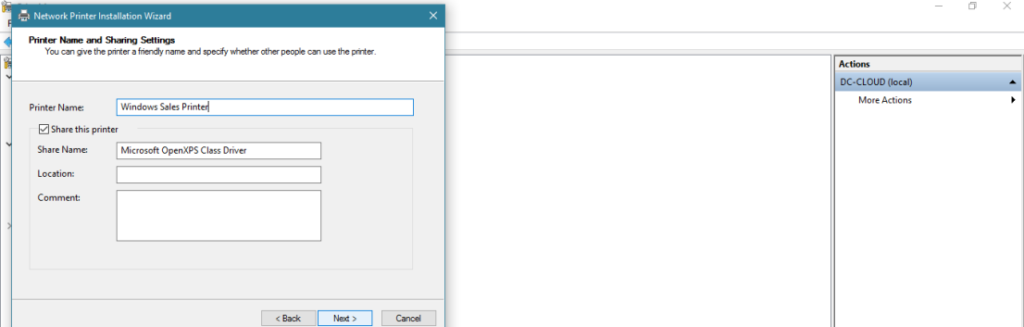
Step 9: Click Next/Next times to accept the default printer name and share name, and to install the printer.
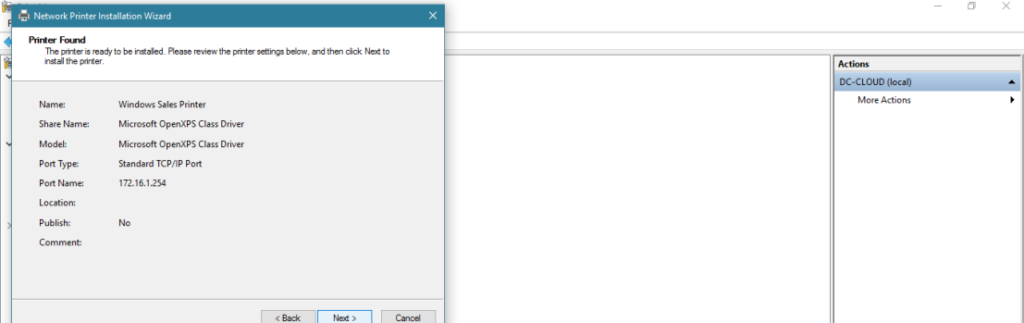
Step 10: Click Finish to close the Network Printer Installation Wizard.
Branch Office Direct Printing
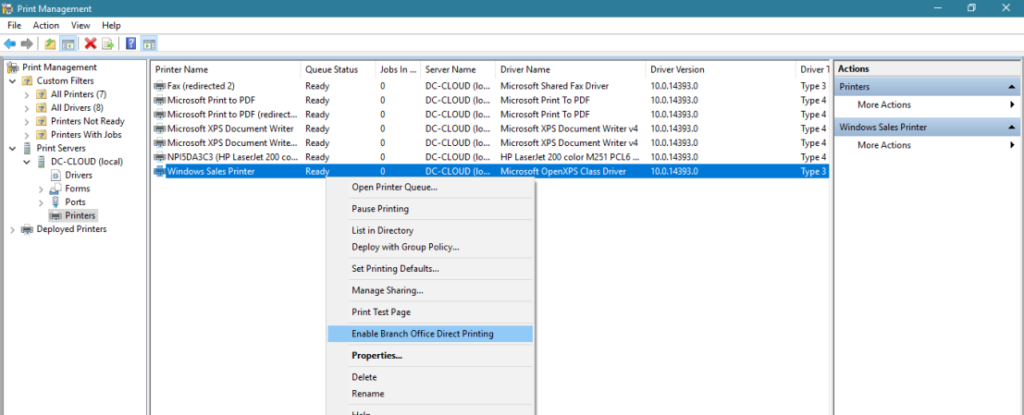
Step 1: In the Print Management console, right-click the Windows Sales Printer, and then click Enable Branch Office Direct Printing.
Step 2: right-click the Windows Sales Printer, and then select Properties.

Step 3: On the Windows Sales Printer properties, click the Sharing tab, select List in the directory, and then click OK.

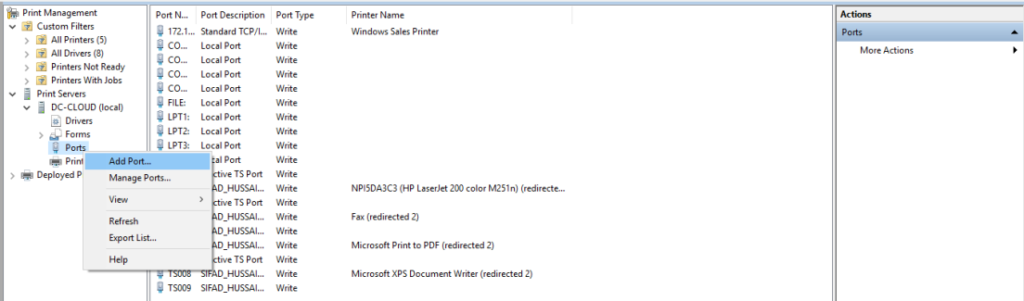
Step 4: Next, lets configure printer pooling, in the Print Management console, under SUB-01 Server , right-click Ports, and then click Add Port.
Step 5: In the Printer Ports dialog box, click Standard TCP/IP Port, and then click New Port.
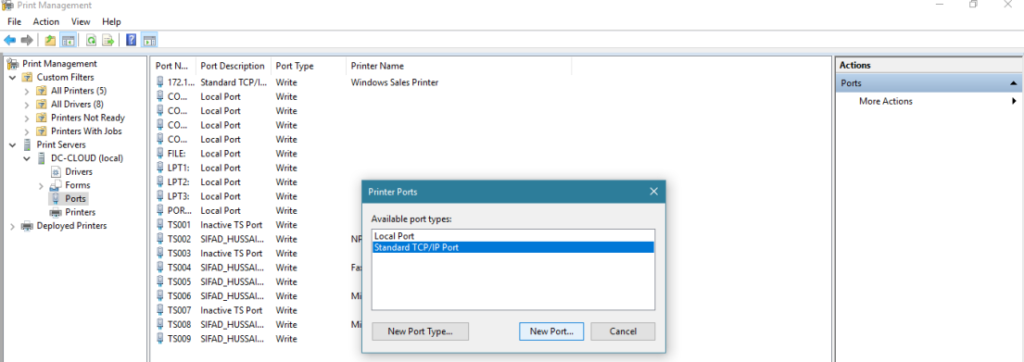
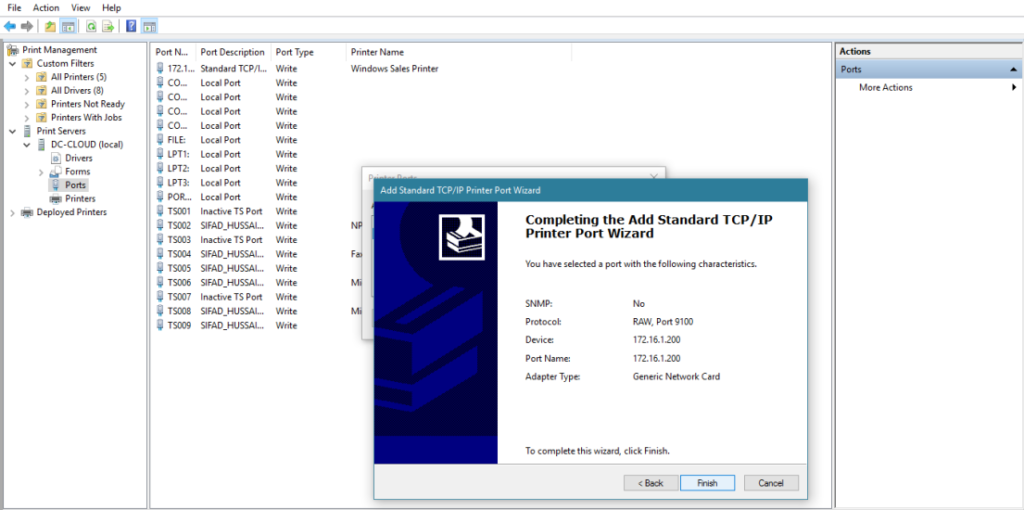
Step 6: In the Add Standard TCP/IP Printer Port Wizard, click Next.
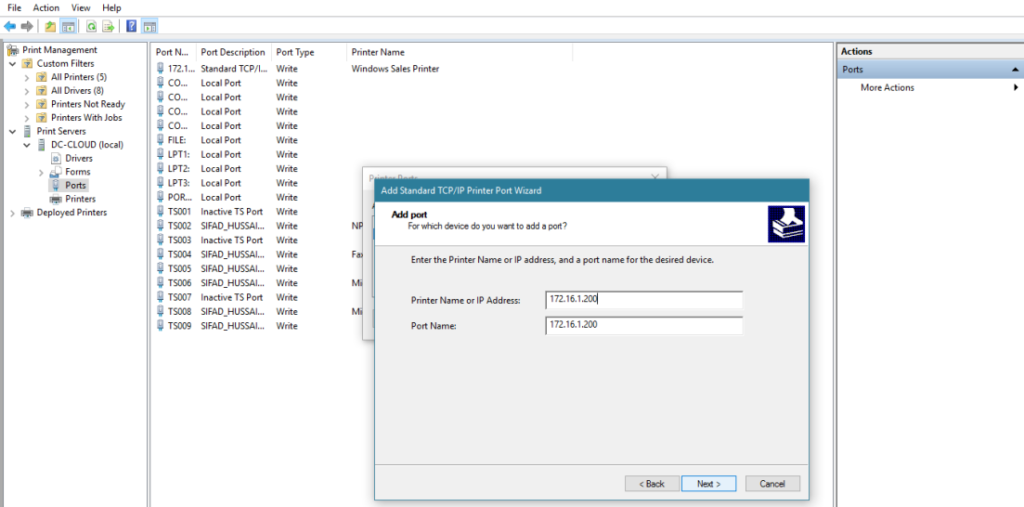
Step 7: On the Add port interface, in Printer Name or IP Address, type 172.16.1.200, and then click Next.
Now, in my case ip address is 172.16.1.200 enter as yours.
Step 8: In the Additional port information required dialog box, click Next.
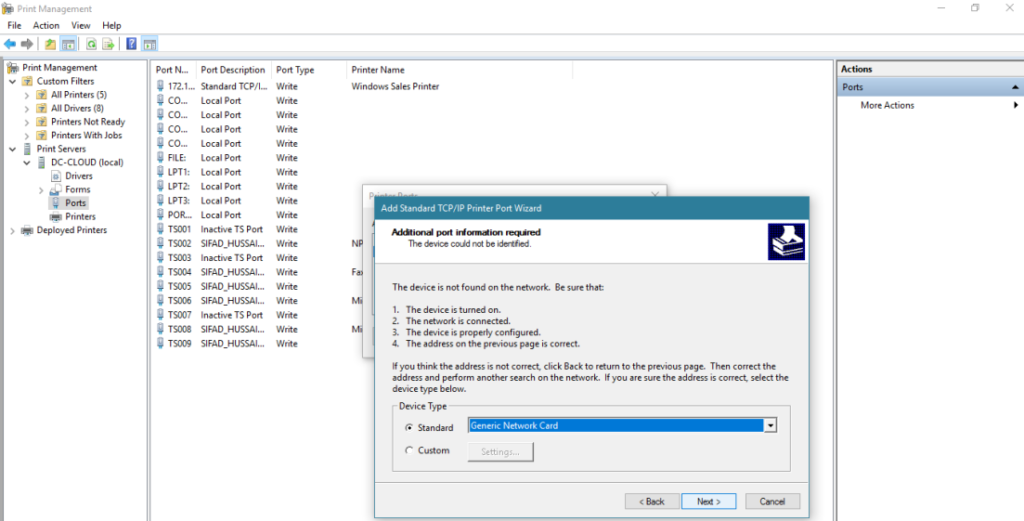
Step 9: Click Finish to close the Add Standard TCP/IP Printer Port Wizard.
Step 10: Click Close to close the Printer Ports dialog box.
Enabling Printer Pooling
Step 1: In the Print Management console, right-click Windows Sales Printer, and then click Properties.

Step 2: In the Windows Sales Printer Properties dialog box, click the Ports tab, select Enable printer pooling, and then click the 172.16.1.200 port to select it as the second port.

Add Printer in Client PC
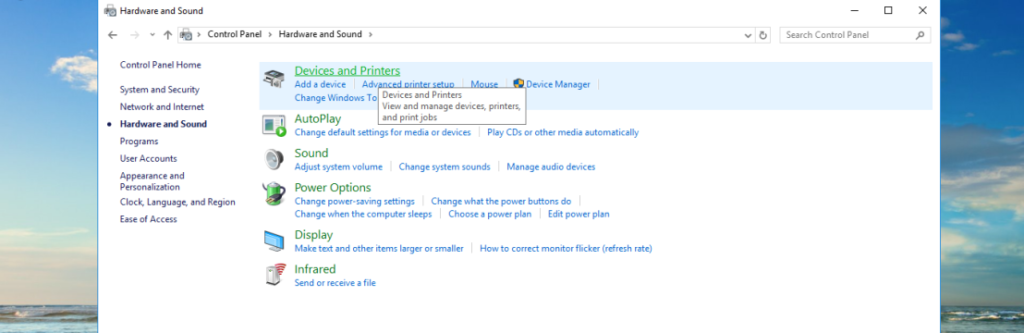
Step 1: Switch to your client PC, open Control Panel, then click Devices and Printers.
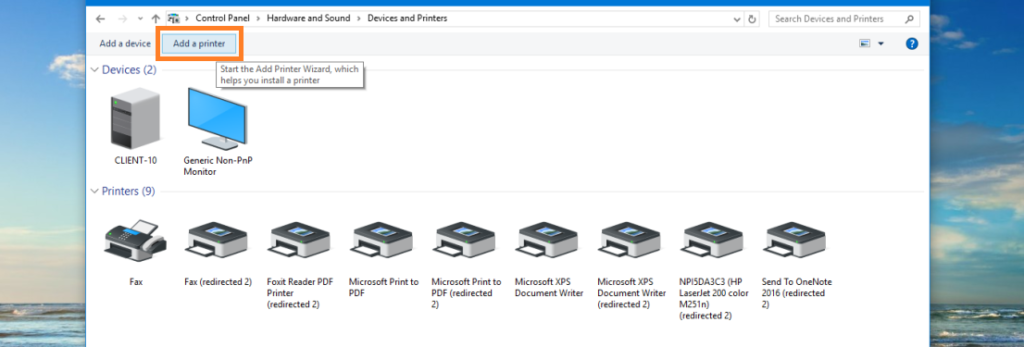
Step 2:In the Devices and Printers console, click Add a printer.
Step 3: On the Add printer interface, under searching for available printers, click your existing Printer name and then click Next. then the wizard will install the printer driver from the DC-CLOUD.Windows.ae server.

Step 4: On the Add printer interface (it will stated that “You’ve successfully Added Windows Sales Printer on 172.16.1.254”), click Next.
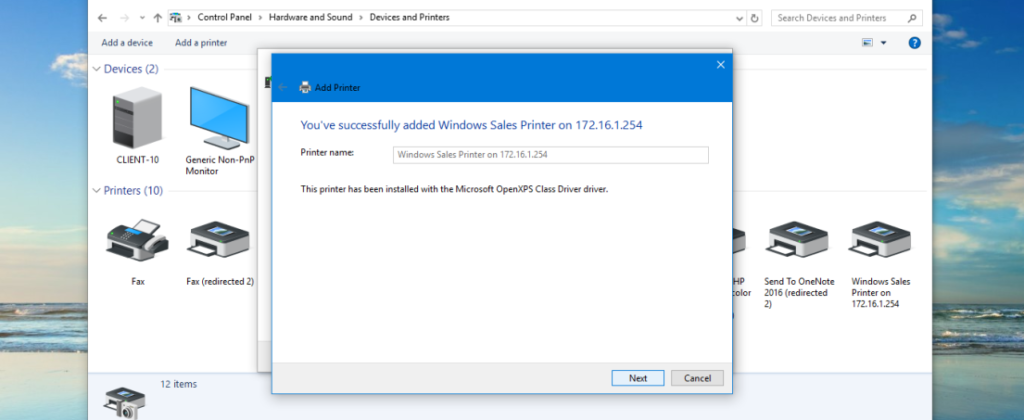
Step 5: click Finish.
Step 6: verify that you have Windows Sales Printer is listed in your Devices and Printers control panel.