
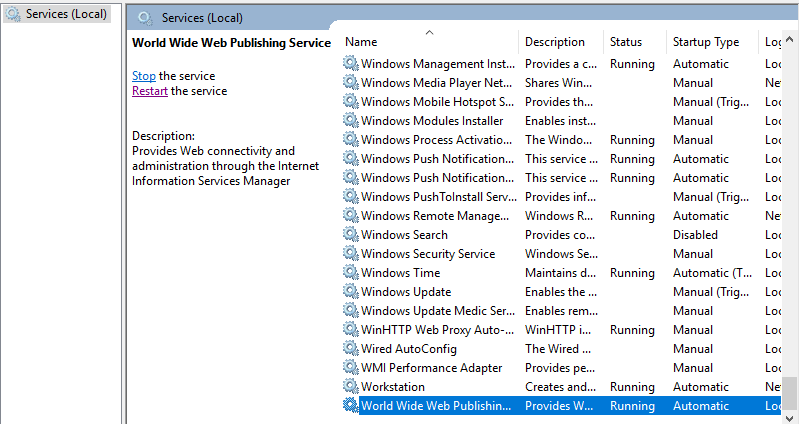
An IIS web server runs on the Microsoft .NET platform on the Windows OS. Internet Information Services server (IIS server) is a Windows Server-based web application used to deliver website content over the internet to an end user. Internet Information Services is an installable server role, and it is bundled with all Microsoft Windows Server products. More recently, Microsoft has bundled IIS components with the professional versions of their desktop operating system products, such as Windows 10 Pro; however, IIS is typically deployed and centrally managed on one or more Microsoft Windows Servers.
A web server is a process for hosting web applications. The web server allows an application to process messages that arrive through specific TCP ports (by default). For example, the default port for HTTP traffic is 80, and the one for HTTPS is 443. When you visit a website in your browser, you don’t typically specify the port number unless the web server is configured to receive traffic on ports other than the default. Visiting http://www.example.com will send your request to port 80 implicitly. You could specify the port number if you’d like http://www.example.com:80, and https://www.example.com:443 for TLS (Transport Layer Security). Assuming the default configuration and TLS is configured for your web application, the web server will receive all inbound traffic to ports 80 and 443. What the web server does with the traffic from there depends. There are countless options for how the web server can process those requests.
The two main process models for web servers are to either handle all requests on a single thread, or to spawn a new thread for each request. Although the single-thread model (Node.js, for example) has some worker threads available, it typically only uses them for certain kinds of work, such as file system access. The thread-per-request model that IIS (and its lightweight cousin IIS Express) uses will grab a thread from a thread pool for each request. Web servers typically handle requests using a request-response pattern. The client sends a request and receives a response if all goes well. HTTP protocol is the ubiquitous choice when communicating between a client and web server over the internet.
- Install IIS
- Use Default website
- Configure Virtual Directory
- Add Websites
- SSL/TLS Setting
- Enable HSTS
- Install ASP.NET feature
- Set Basic Authentication
- WebDAV Setting
- Set Windows Authentication
- IP and Domain Restrictions
- Use Python scripts
Install IIS
Step 1: Run Server Manager and Click Add roles and features and click Next on first page
Step 2: Select Role-based or feature-based installation.

Step 3: Select a Host which you’d like to add services.

Step 4: Check a box Web Server (IIS).

Step 5: Additional features are required to add IIS Server. Click Add Features button and then Click Next button.

Step 6: Click Next and Next button on two windows.

Step 7: This is the section to select Web Server features. Select them your’d like to add.
On this example, keep default and proceed next. It’s possible to add these features after installing IIS, of course.

Step 8: Click Install button.

Step 9: After finishing Installation, click Close button.
Step 10: Run Web browser and access to localhost, then it’s possible to verify IIS is running normally.

Use Default website
Step 1: Run Start -> Server Manager and Click Tools -> Internet Information Services (IIS) Manager.

Step 2: Open items on left pane, Default Web Site is configured.

Step 3: Select Default Web Site and Click Advanced Settings…, then it’s possible to confirm settings like Physical Path (Document Root) and so on.

Step 4: Open Default Document, then it’s possible to confirm default documents.

Step 5: You can see default documents.

Step 6: Create a test page under the Physical Path (Document Root) and verify accesses with Web browser.

Configure Virtual Directory
Step 1: Run Start -> Server Manager and Click Tools -> Internet Information Services (IIS) Manager, and then Click View Virtual Directories on the right pane.

Step 2: Right Click on any place on the center pane and open Add Virtual Directory.

Step 3: Input URL Path for Alias field, for Physical Path field, input Physical folder Path.

Step 4: After added normally, new virtual directory is listed.

Step 5: Create a test page under the directory you set as Physical Path for virtual directory setting, and verify accesses.

Add Websites
Step 1: Run Start -> Server Manager and Click Tools -> Internet Information Services (IIS) Manager, and then Right Click Sites on the left pane and Select Add Website.

Step 2: Input any Site name (it is used on IIS Manager) for Site name field, for Physical path field, input Physical folder Path for this new site, and for Host name, input server’s hostname.

Step 3: If added normally, new Web Site is displayed on Sites list.

Step 4: Create a test page for new Web Site and verify accesses.

Add SSL/TLS Setting
First, Buy or Get ot Create SSL Certificate.
For this tutorial i am going to create self sign SSL Certificate. Self Signed SSL Certificate is for the purpose of development or testing, if you use your server as a business, it had better buy and use a Formal Certificates.
Step 1: Run PowerShell with Admin Privilege and work.

Step 2: If you’d like to see the your self signed certificate on GUI, run Run and input certlm.msc.

Step 3: If you created self signed certificate like this example Cert:\LocalMachine\My, it is stored under Personal -> Certificate.
Step 4: Now, import SSL certificate in certificates store.
On this example, import it under Certificates -> Local Computer -> Personal like follows.

Step 5: Configure SSL/TLS Setting for a Web Site.
Run Start -> Server Manager and Click Tools -> Internet Information Services (IIS) Manager and then Right Click the Site you’d like to set SSL binding on the left pane and Select Edit Bindings.

Step 6: Click Add button.

Step 7: Select https on Type filed and input Web Site’s Hostname on Host name field. For SSL certificate field, Select your certificate that you imported on [4] section.

Step 8: SSL binding is configured.

Step 9: Access to the Web Site with HTTPS to verify working.

Enable HSTS
Enable HSTS (Hypertext Strict Transport Security) for Web Sites.
For includeSubDomains option below, all subdomains are included in HSTS target, so you need to verify well before setting it’s possible to access to all subdomains with HTTS if specify this option.
Step 1: Run Start -> Server Manager and Click Tools -> Internet Information Services (IIS) Manager, and then Select a Web Site you’d like to set HSTS and Click HSTS… on the right pane.

Step 2: Check a box Enable.
For other items, refer to https://hstspreload.org/.

Install ASP.NET feature
Install Install ASP.NET feature to configure Web Application environment.
Step 1: Run Star -> Server Manager and enter Add roles and features, then check a box [ASP.NET 4.7] like follows. (if install ASP.NET 3.5, check a box, too)

Step 2: Additional features are required to add ASP.NET, Click Add Features button and proceed to Install.

Step 3: After finishing installation, create a test page to verify working.

Step 5: That’s OK if test aspx page returns normally.

Set Basic Authentication
Set Basic Authentication to a folder to require authentication for users.
Step 1: Run Start -> Server Manager and enter Add roles and features, then check a box Basic Authentication and install it.

Step 2: After installing, restart IIS.
Step 3: Create a folder that you’d like to set Basic Authentication.
On this example, create a auth_basic folder for it. Also add NTFS access permission for users or groups you’d like to allow to access to the folder.
Run Start -> Server Manager and Click Tools -> Internet Information Services (IIS) Manager, and then Select a folder you’d like to set Basic Authentication on the left pane and then Open to click Authentication on the center pane.

Step 4: Disable Anonymous Authentication and Enable Basic Authentication like follows.

Step 5: Create a test page under the folder you set Basic Authentication and verify accesses. Authenticate with a user you set to allow accesses.

That’s OK if successfully authenticate and test page is shown normally.
WebDAV Setting
Step 1: Create a users or groups to allow to access to WebDAV folder.
On this example, create a DavGroup group and add Serverworld user to it to allow WebDAV access.

Step 2: Install WebDAV feature.
Run Start -> Server Manager and enter Add roles and features, then check a box WebDAV Publishing and install it. After installing it, restart IIS service.

Step 3: Create a folder for WebDAV.
On this example, set a virtual directory webdav like follows (physical path is [C:\inetpub\webdav]).

Step 4: Select a Web site you’d like to set WebDAV on the left pane and then, Click to open WebDAV Authoring Rules on the center pane.

Step 5: Click Enable WebDAV on the right pane.

Step 6: Select a folder for WebDAV and then, Click to open [WebDAV Authoring Rules] on the center pane.

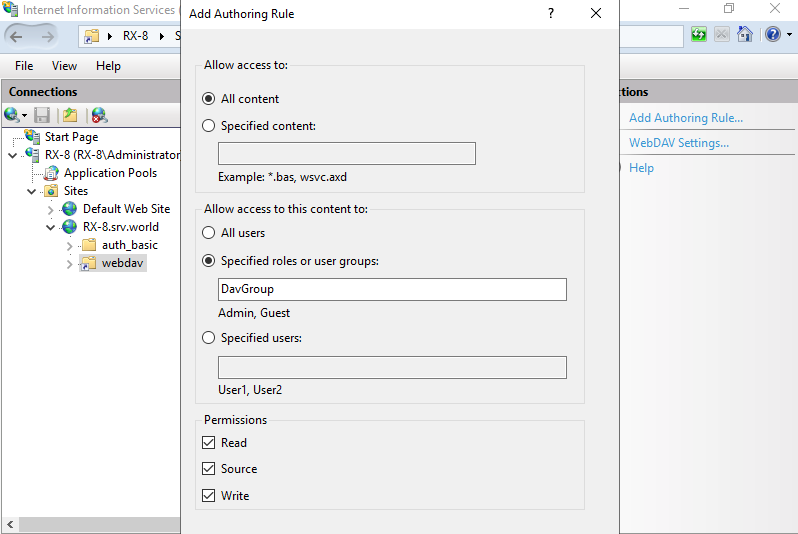
Step 7: Click to open Add Authoring Rule on the right pane.

Step 8: Set access permission for WebDAV accesses. On this example, set like follows.
Step 9: It also needs NTFS access permission for WebDAV folder. Select WebDAV folder and right clicking it, then select to open Access permission, then add permissions for your requirements.

Step 10: Select a folder for WebDAV and then, Click to open Authentication on the center pane.

Step 11: Disable Anonymous Authentication and Enable Basic Authentication like follows.

Step 12: Select a folder for WebDAV and then, Click to open Directory Browsing on the center pane.

Step 13: Click Enable on the right pane. For information to display, select the one you’d like to set.

Step 14: That’s OK. Access to the URL of WebDAV folder with Web Browser. If success authentication and displayed content of WebDAV folder, settings are no problem.

Below is how to access to WebDAV folder from Client Computers. This example in on Windows 10.
There are some WebDAV client softwares in the world, but on this example, use Windows WebDAV client feature.
Step 15: Open This PC and move to Computer tab, then Click Add a network location.

Step 16: Click Next button.

Step 17: Click Next button.

Step 18: Input WebDAV folder’s URL and Click Next button.

Step 19: Authenticate with a user you set to allow to access.

Step 20: After successfully finished authentication, Input any name to WebDAV folder that is used on your PC.

Step 21: Click Finish button. If successfully accessed to WebDAV folder, verify to read and write files or directories.

Set windows Authentication
Step 1: Run Start -> Server Manager and enter Add roles and features, then check a box Windows Authentication and install it.

Step 2: After installing, restart IIS.
Step 3: Create a folder that you’d like to set Windows Authentication.
On this example, create a auth_win folder for it. Also add NTFS access permission for users or groups you’d like to allow to access to the folder.
Run Start -> Server Manager and Click Tools -> Internet Information Services (IIS) Manager, and then Select a folder you’d like to set Windows Authentication on the left pane and then Open to click Authentication on the center pane.

Step :4 Disable Anonymous Authentication and Enable Basic Authentication like follows.

Step 5: Create a test page under the folder you set Windows Authentication and verify accesses.
If Client host is also Windows and that is in specific cases written in the beginning of this page, the authentication form like follows are not displayed, but on other cases, following authentication form is displayed and required to input user authentication information.

That’s OK if successfully authenticate and test page is shown normally.
IP and Domain Restrictions
Step 1: Run Start -> Server Manager and enter Add roles and features, then check a box IP and Domain Restrictions and install it.

Step 2: On this example, Set restriction to [content01] folder on [RX-8.srv.world] site.
Select target folder on the left pane and open IP Address and Domain Restrictions on the center pane.

Step 3: By default, setting is allow all, so click Add Deny Entry on the right pane to restrict some IP address.

Step 4: Input an IP address on Specific IP address field, or IP address range on IP address range.
On this example, set 10.0.0.128/29 range to deny from them.

Step 5: After setting, entries are displayed. If you’d like to add more, possible to add with the same operation.

Step 6: After setting, verify working normally to access from denied computer and allowed computer.
The example below shows that source computer that has 10.0.0.134 accessed to IIS site but he was denied as restricted settings.

Step 7: The example below shows that source computer that has 10.0.0.137 accessed to IIS site and he could access to it as settings.

Step 8: For more example, Set config to content02 folder on RX-8.srv.world site.
Select target folder on the left pane and click to open IP Address and Domain Restrictions on the center pane, then following windows is shown. Change default allow all setting on here, Click Edit feature setting on the right pane.

Step 9: Change to Deny on Access for unspecified clients field. By this change, default setting turns to deny all.

Step 10: Click Add Allow Entry on the right pane.

Step 11: Input an IP address on Specific IP address field, or IP address range on IP address range.
On this example, set [10.0.0.240/255.255.255.240] range to allow from them.

Step 12: After setting, entries are displayed. If you’d like to add more, possible to add with the same operation.

Step 13: After setting, verify working normally to access from denied computer and allowed computer.
The example below shows that source computer that has [10.0.0.239] accessed to IIS site and he was denied as settings.

Step 14: The example below shows that source computer that has [10.0.0.254] accessed to IIS site and he could access to it as allow settings.

Step 16: By the way, it’s possible to set domain name based restrictions, too. However, for the screen like below, it is not recommended.

Use Python scripts
Step 1: Run Start -> Server Manager and enter Add roles and features, then check a box CGI and ISAPI Extensions and install them.

Step 2: For example, set *.py scripts as executable under content01 folder on X-7.srv.world site.
Select target folder on the left pane and Open Handler Mappings on the center pane.

Step 3: Click Add Script Map on the right pane.

Step 4: For the Name field, input any name you like, for other fields, input like follows.
(but your Python path is different, replace to your path)

Step 5: Click Yes.

Step 6: [*.py] handler mapping has been added.

Step 7: Create a Python test script to verify setting.

Step 8: Access to the test script to verify working.


