iSCSI is an acronym for Internet Small Computer Systems Interface, an Internet Protocol (IP)-based storage networking standard for linking data storage facilities. It provides block-level access to storage devices by carrying SCSI commands over a TCP/IP network. iSCSI is used to facilitate data transfers over intranets and to manage storage over long distances. It can be used to transmit data over local area networks (LANs), wide area networks (WANs), or the Internet and can enable location-independent data storage and retrieval.
The protocol allows clients (called initiators) to send SCSI commands (CDBs) to storage devices (targets) on remote servers. It is a storage area network (SAN) protocol, allowing organizations to consolidate storage into storage arrays while providing clients (such as database and web servers) with the illusion of locally attached SCSI disks. It mainly competes with Fiber Channel, but unlike traditional Fiber Channel which usually requires dedicated cabling, iSCSI can be run over long distances using existing network infrastructure.
- Install iSCSI Target
- Configure iSCSI Target
- Configure iSCSI Initiator
Install iSCSI Target
Step 1: Run Server Manager and Click Add roles and features and click Next on first page
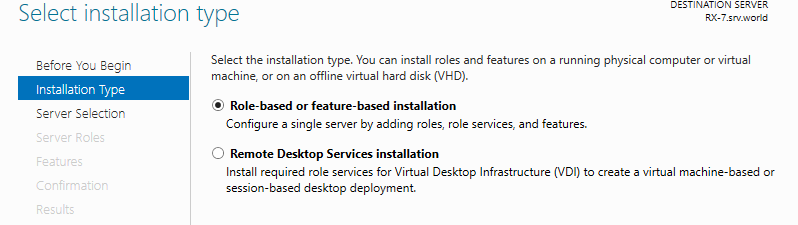
Step 2: Select Role-based or feature-based installation.
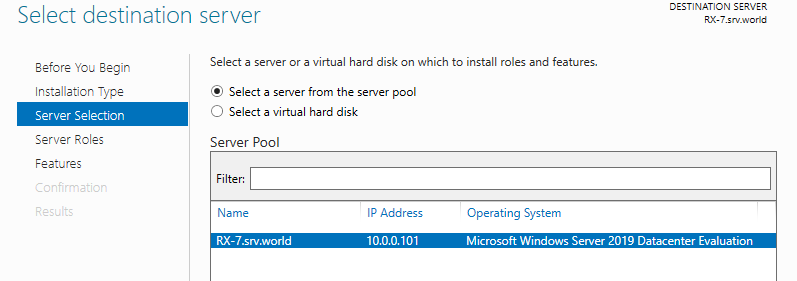
Step 3: Select a Host which you’d like to add services.
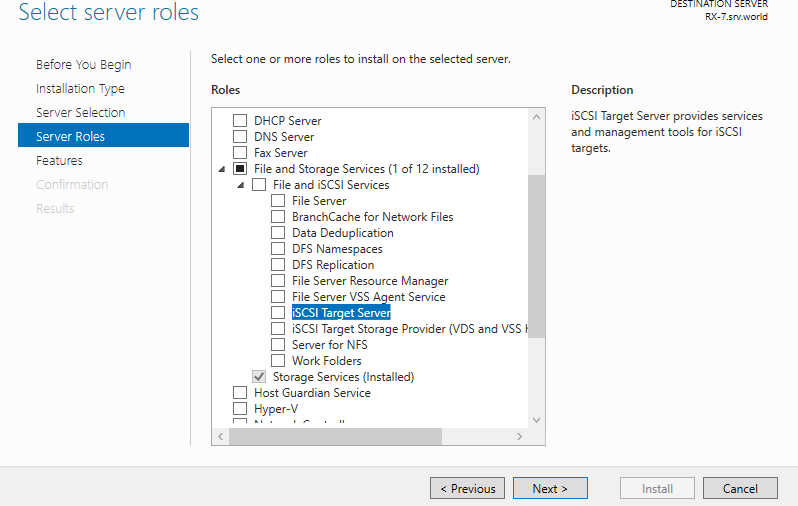
Step 4: Check a box iSCSI Target Server.
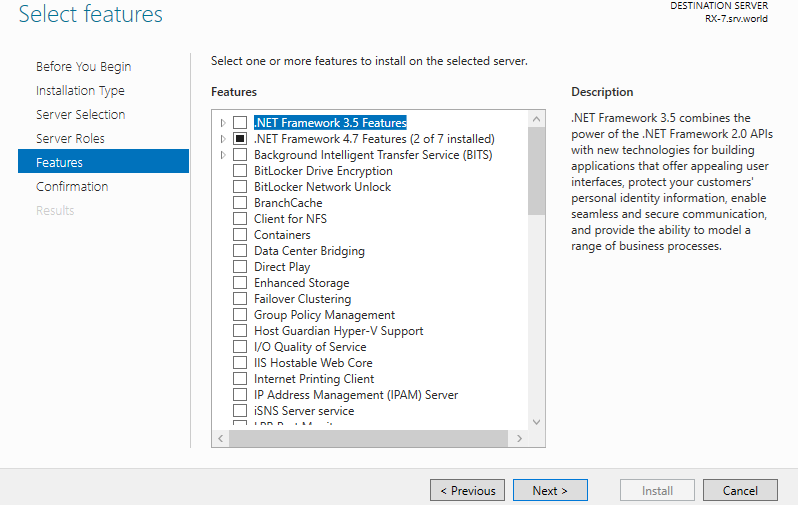
Step 5: Additional features are required to add iSCSI Target. Click Add Features button and proceed Next.
Step 6: Click Next button.
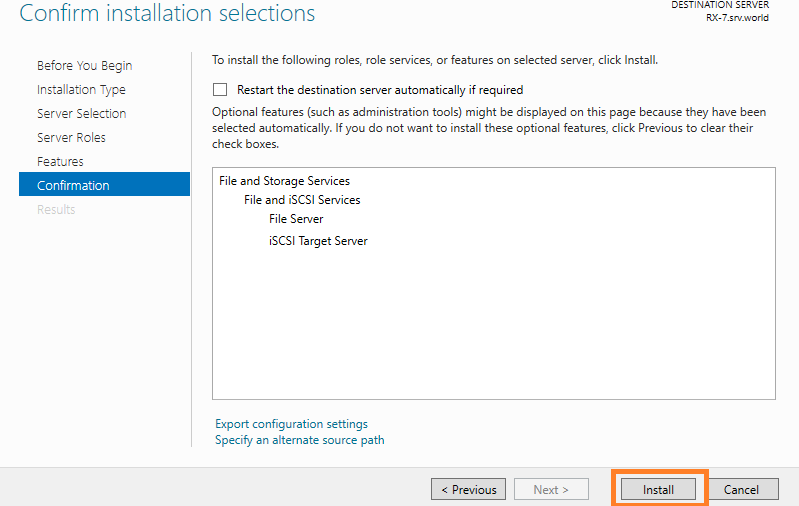
Step 8: Click Install button.
Step 9: After finishing Installation, click Close button.
Configure iSCSI Target
Configuring iSCSI Target Server.
A storage on a network is called iSCSI Target, a Client which connects to iSCSI Target is called iSCSI Initiator.
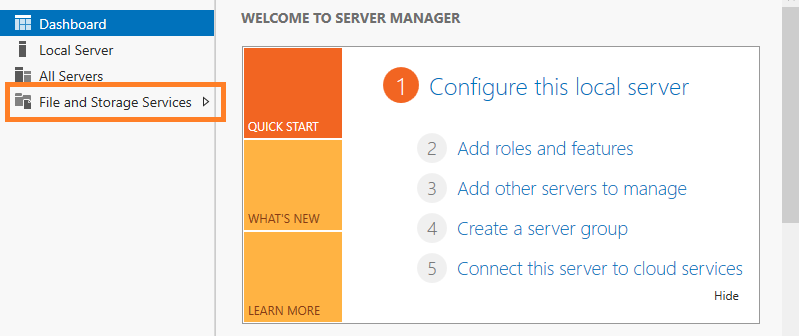
Step 1: Run Server Manager and Click File and Storage Services.
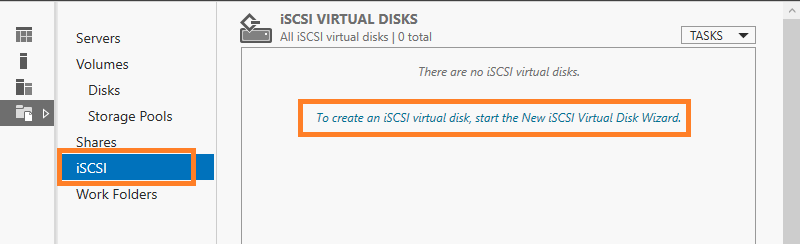
Step 2: Select iSCSI on the left pane and click To create an iSCSI….. link on the right pane.
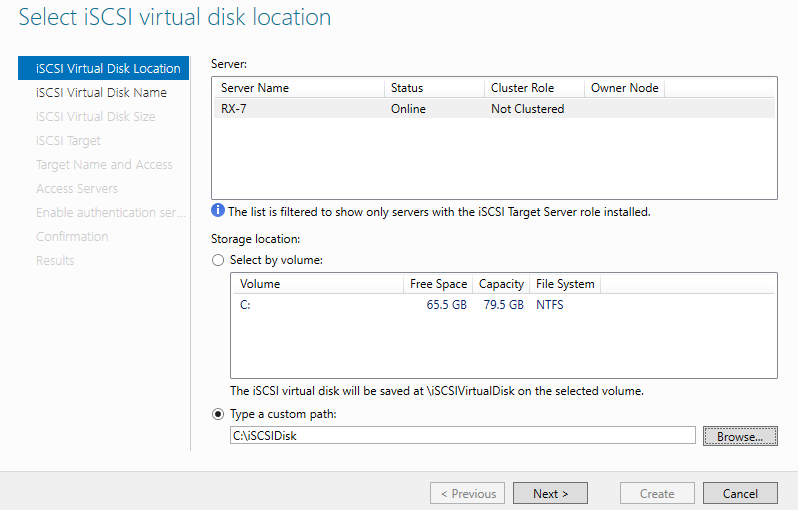
Step 3: Specify the server and volume for setting iSCSI disk. This example shows to configure a disk on a custom path (C:iSCSIDisk).
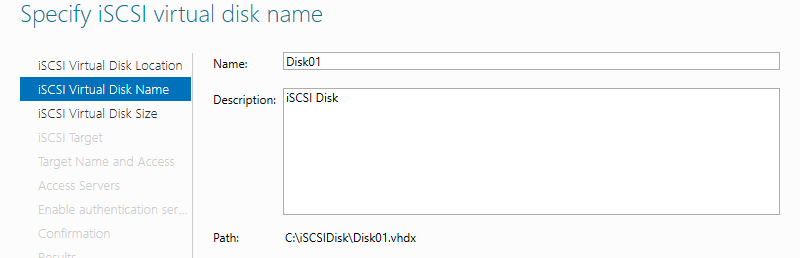
Step 4: Specify any name for virtual disk.
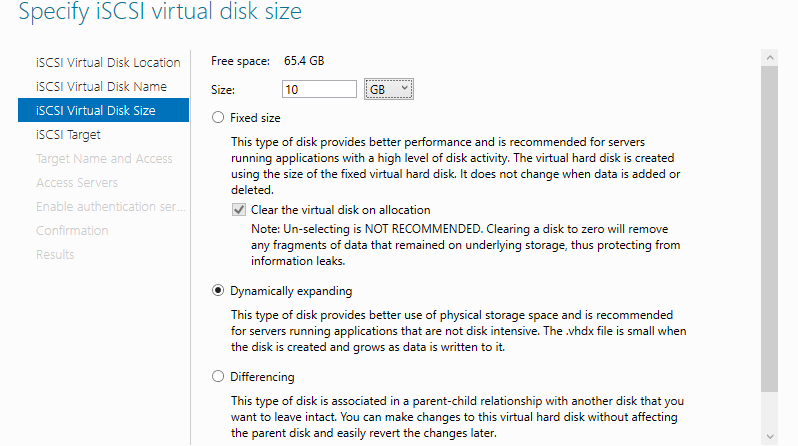
Step 5: Specify the disk size for virtual disk.
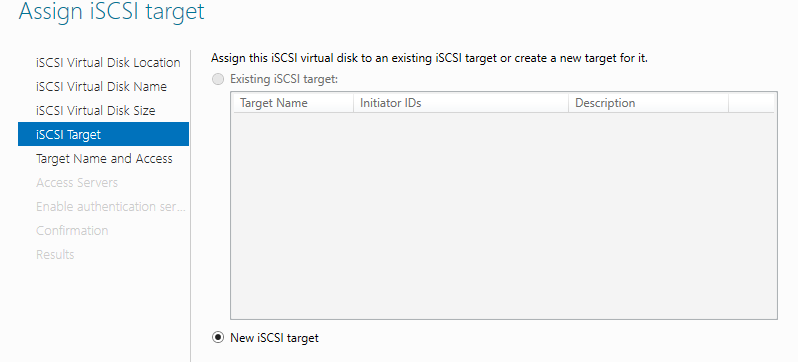
Step 6: Specify the iSCSI Target to assign this virtual disk. If the Target is new, select like follows.
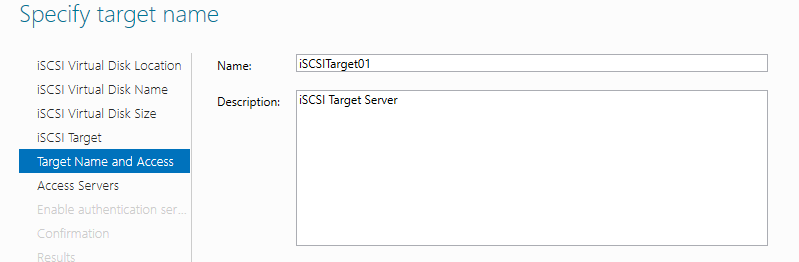
Step 7: Specify any name for iSCSI Target.
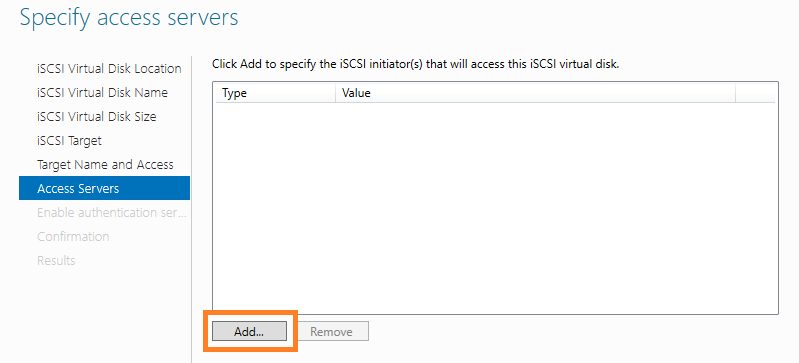
Step 8: Specify access servers to this iSCSI Target. Click Add… button.
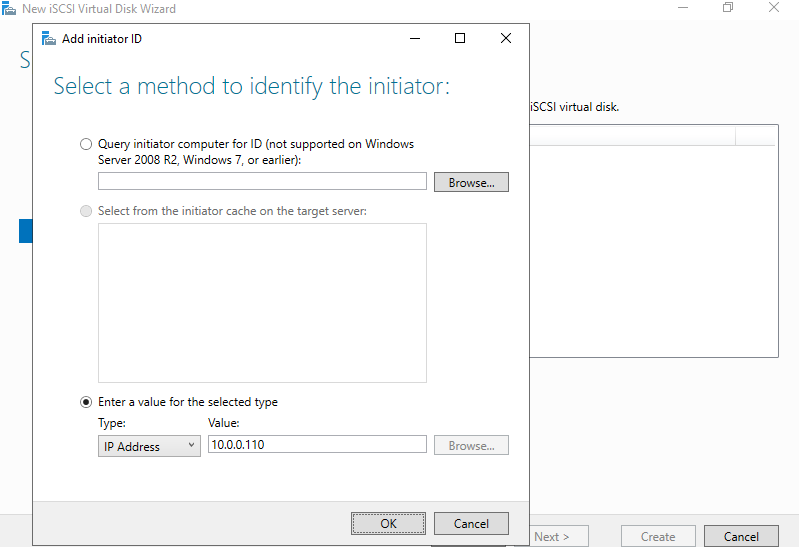
Step 9: Select a method to identify the initiator. This example shows to set initiators by IP address like follows.
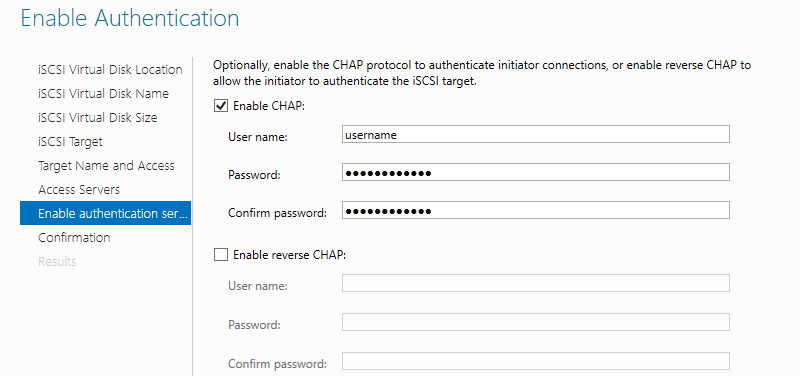
Step 10: Configure authentication method between Target and Initiator. This example shows to configure CHAP like follows. If select CHAP, set username and password too that are used for connecting to Target from Initiator.
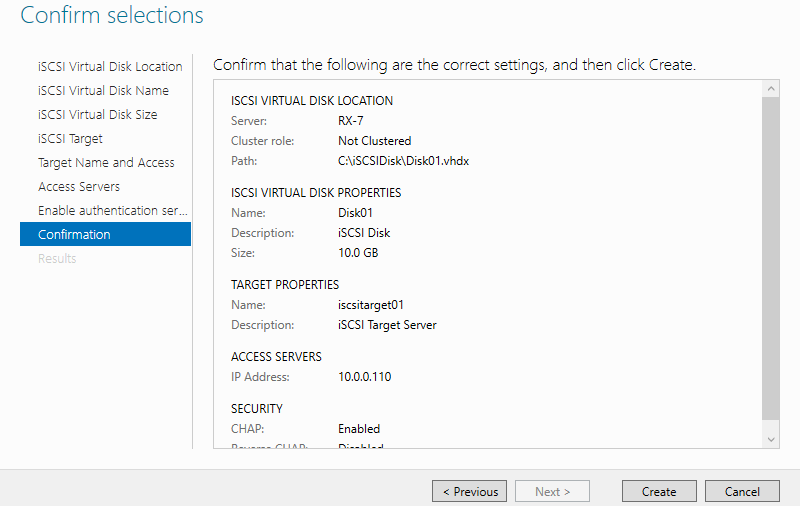
Step 11: If it’s OK all, click Create button.
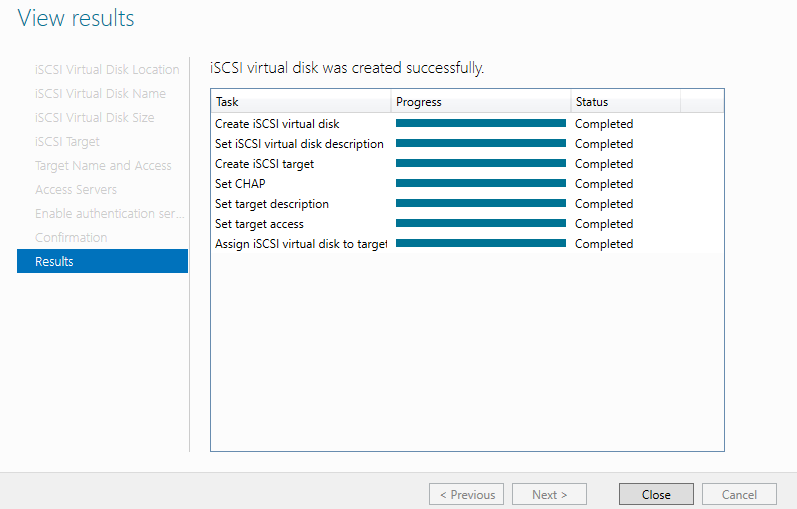
Step 12: After finishing creating, click Close button.
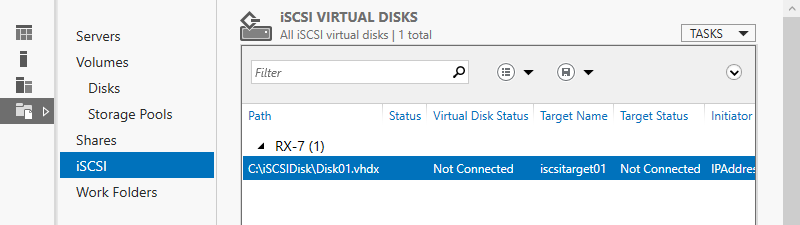
Step 13: A new virtual disk has been listed like follows.
Configure iSCSI Initiator
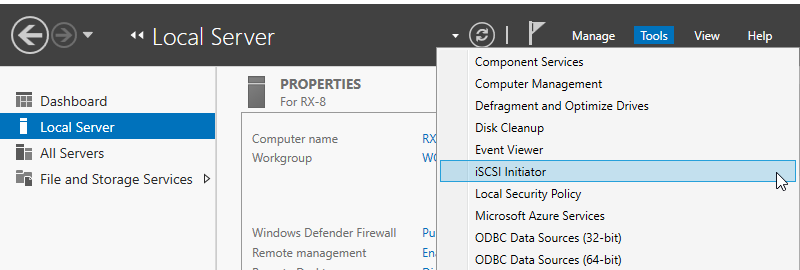
Step 1: Run Server Manager and Open Tools -> iSCSI Initiator.
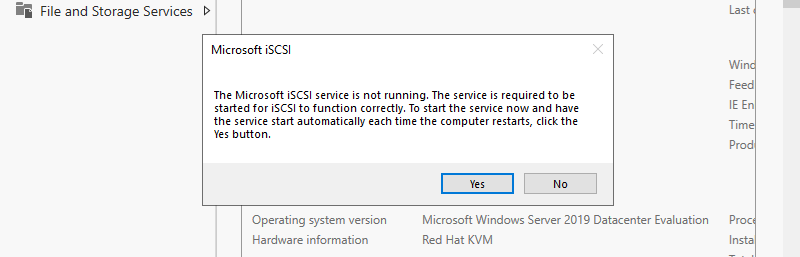
Step 2: Click Yes button to proceed. This message is shown because iSCSI service is not running by default.
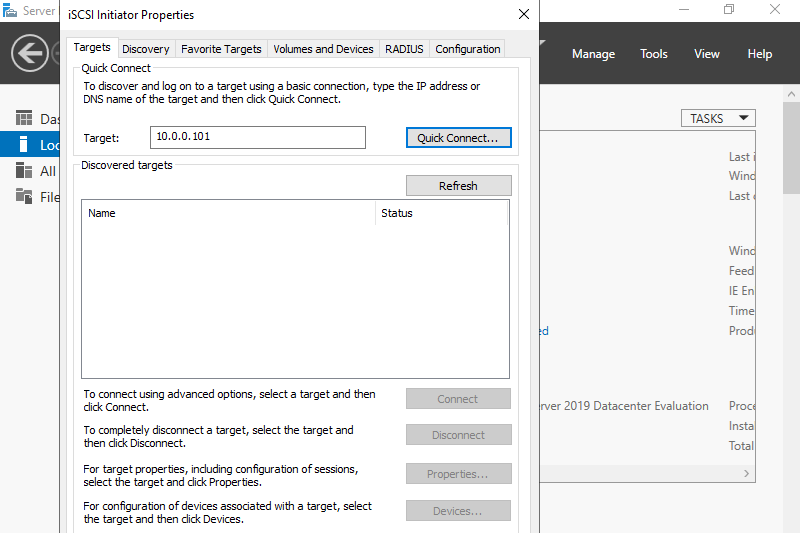
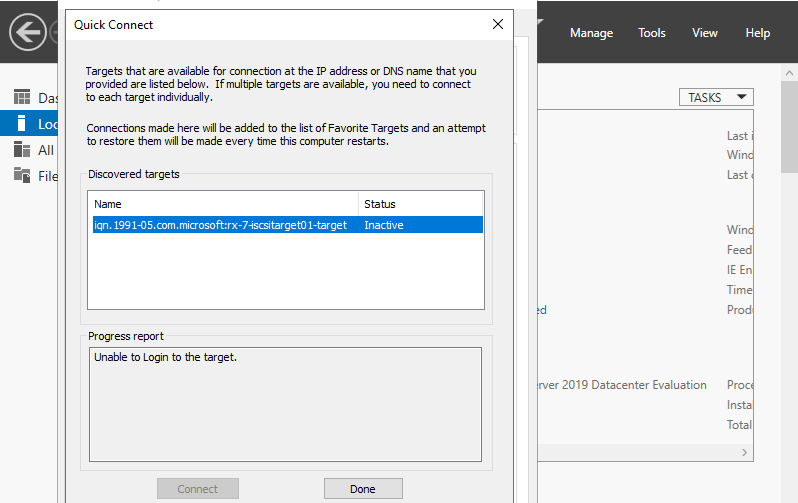
Step 3: Input Target’s Hostname or IP address on Target field and click >Quick Connect button.
Step 4: iSCSI Target has been detected like follows, click Done
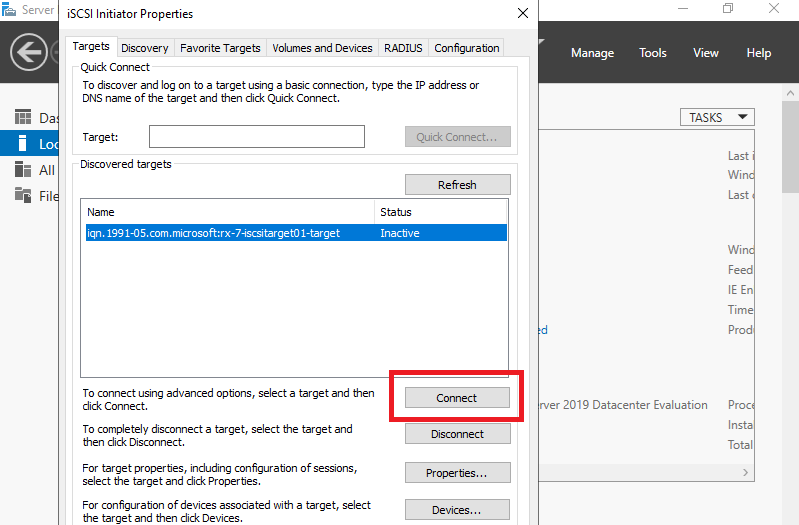
Step 5: Click Connect button.
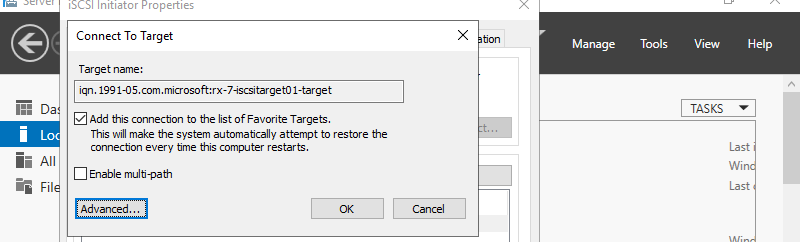
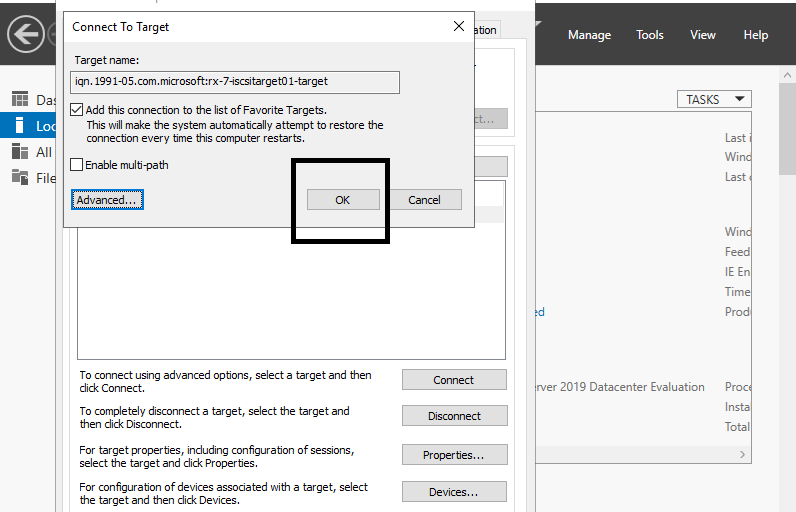
Step 6: Click Advanced button.
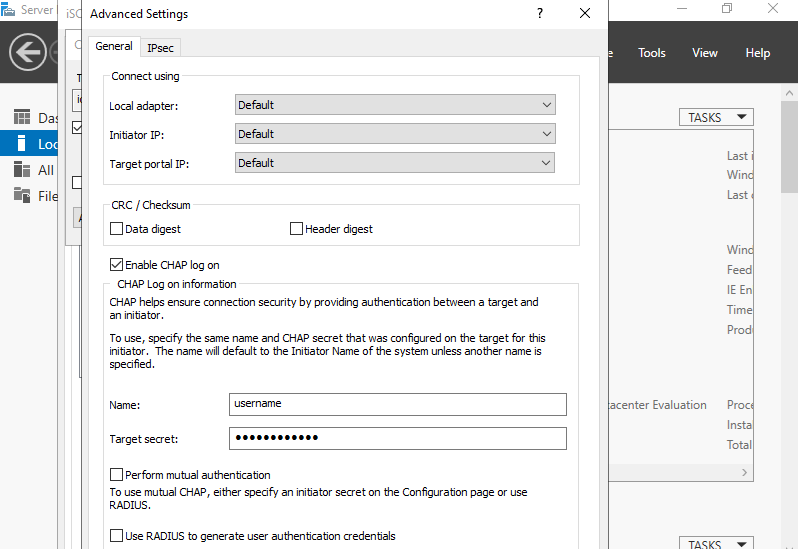
Step 7: Check a box Enable CHAP log on and specify username and password on the fields. They are the just one you set on iSCSI Target’s configuration.
Step 8: Click OK button.
Step 9: If it’s no problem, the status turns to Connected like follows. It’s OK to configure iSCSI initiator settings.

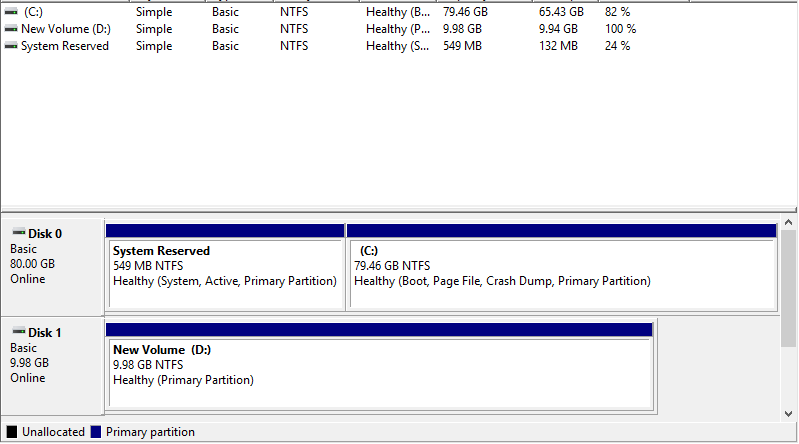
Step 10: On the Disk Management tool, the iSCSI Disk has been attached like follows.

Step 11: To use the iSCSI Disk, turn it online and also initialize and assign drive letter to it.