A DHCP Server is a network server that automatically provides and assigns IP addresses, default gateways and other network parameters to client devices. It relies on the standard protocol known as Dynamic Host Configuration Protocol or DHCP to respond to broadcast queries by clients. A DHCP server automatically sends the required network parameters for clients to properly communicate on the network. Without it, the network administrator has to manually set up every client that joins the network, which can be cumbersome, especially in large networks. DHCP servers usually assign each client with a unique dynamic IP address, which changes when the client’s lease for that IP address has expired.
- DHCP Server : Install
- Configure DHCP Server
- Configure DCHP Client
Install DHCP Server
Step 1: Run Server Manager and Click Add roles and features and click Next on first page
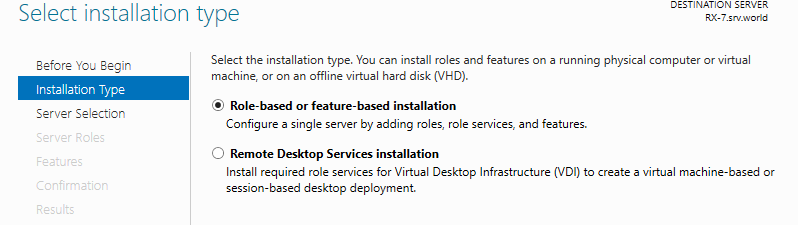
Step 2: Select Role-based or feature-based installation.
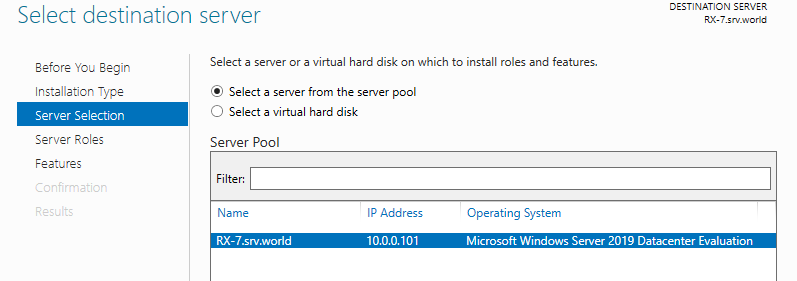
Step 3: Select a Host which you’d like to add services.
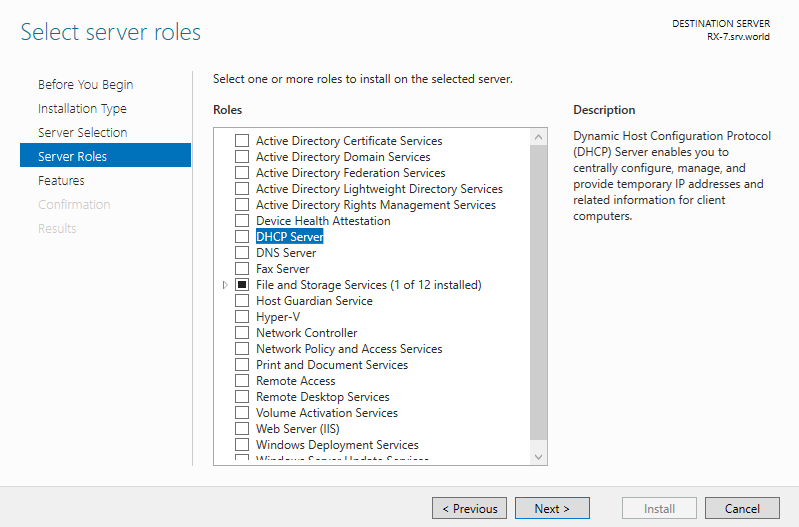
Step 4: Check a box DHCP Server.
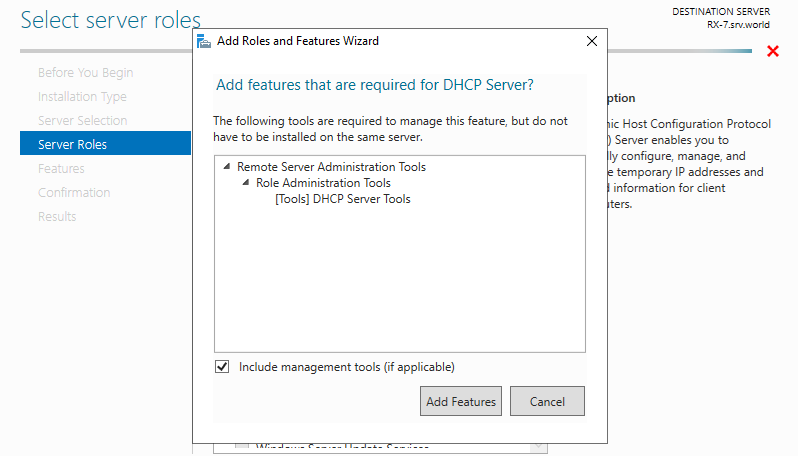
Step 5: Additional features are required to add DHCP Server. Click add Features button and next, Click Next button.
Step 6: Click Next button and DHCP server notes page.
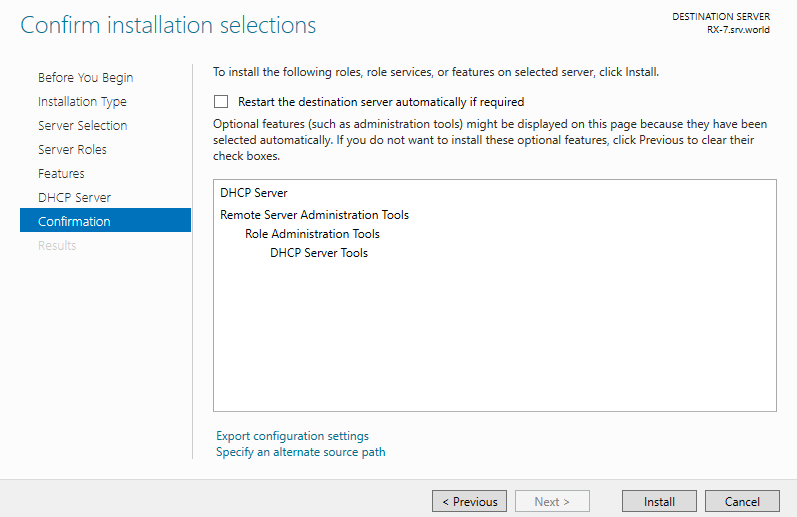
Step 7: Click Install button on confirmation tab.
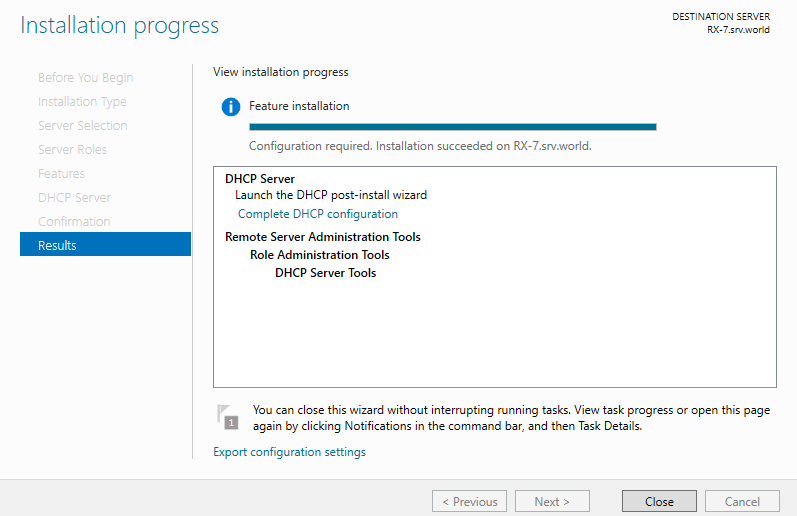
Step 8: After finishing Installation, click Close button.
Configure DHCP Server
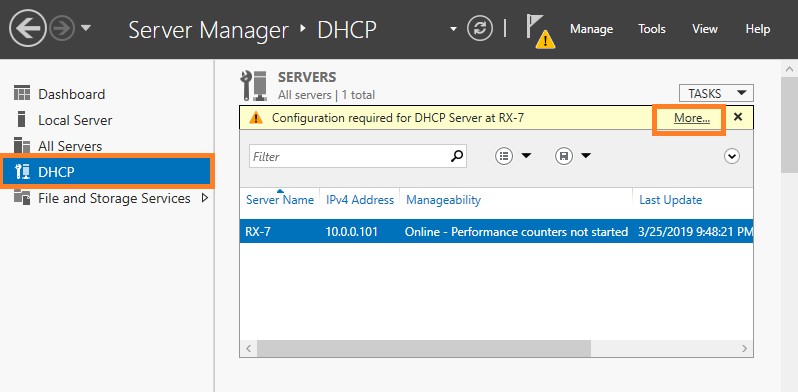
Step 1: Run Server Manager and Click DHCP on the left menu and next, Click More… link which is upper-right.
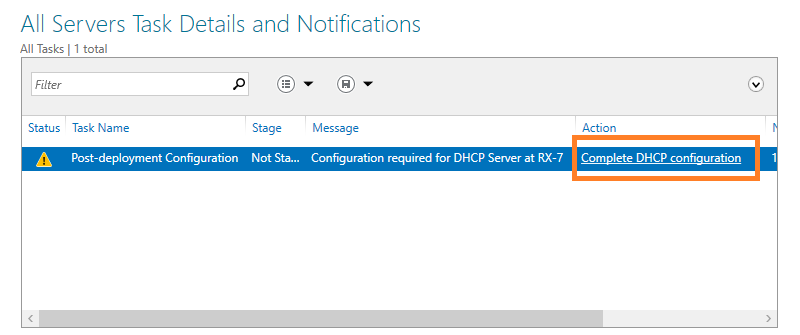
Step 2: Click Complete DHCP configuration link which is upper-right.
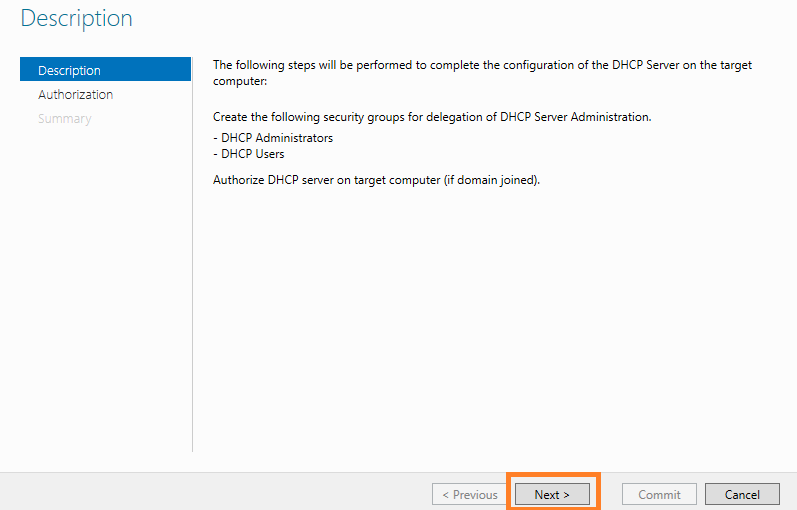
Step 3: Click Next button.
Step 4: If your Server is Stand-Alone Server, select Skip AD authorization and Click Commit button.
If your Server is in AD Domain, though current user is set automatically for AD authorization but if you’d like to change it, set a user for AD authorization and Click Commit button.
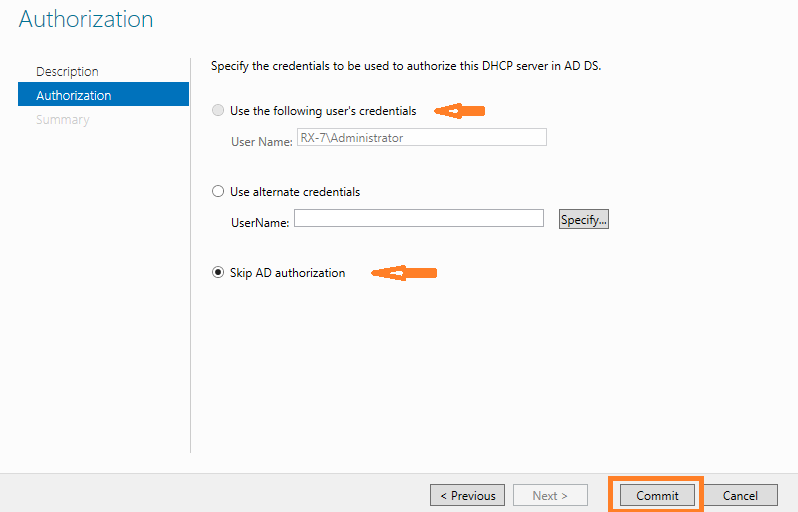
Step 5: After successing authorization normally, click Close button.
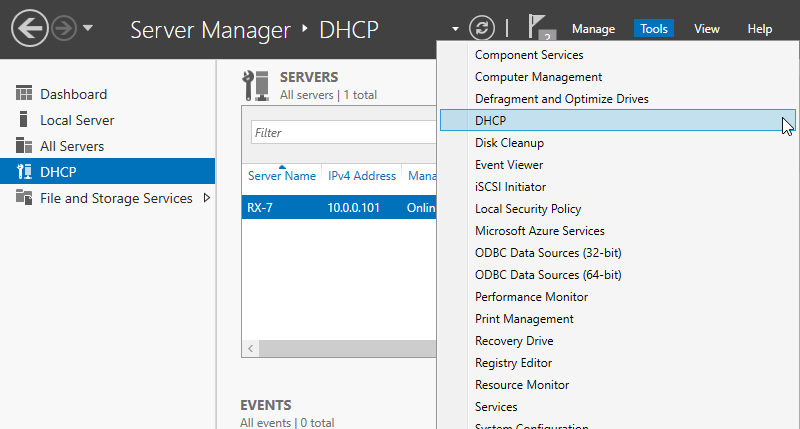
Step 6: Back to Server Manager and open Tools -> DHCP.
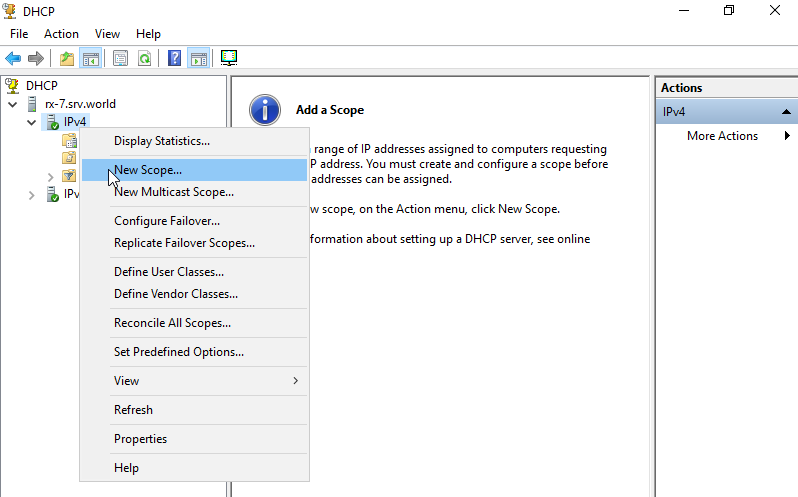
Step 7: Right-Click IPv4 on the left pane and select New Scope….
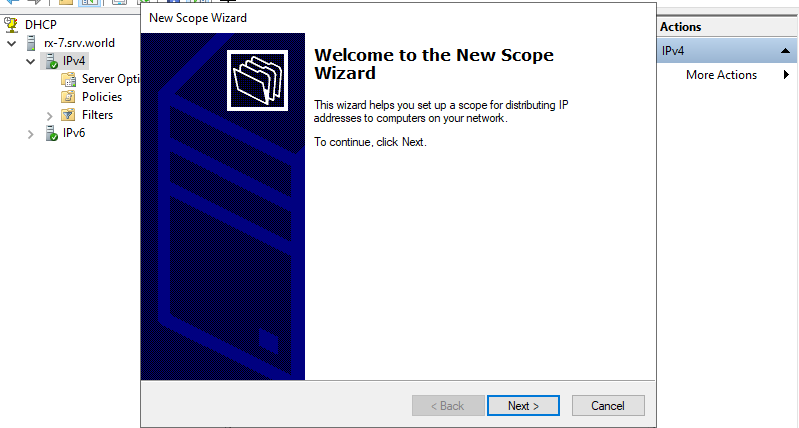
Step 8: Click Next button.
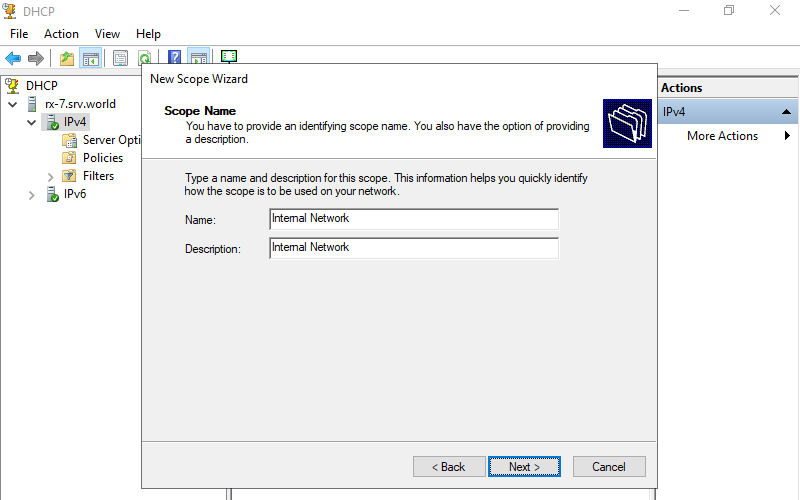
Step 9: Input any name and description for this scope.
Step 10: Input IP address range for lease and subnet mask.

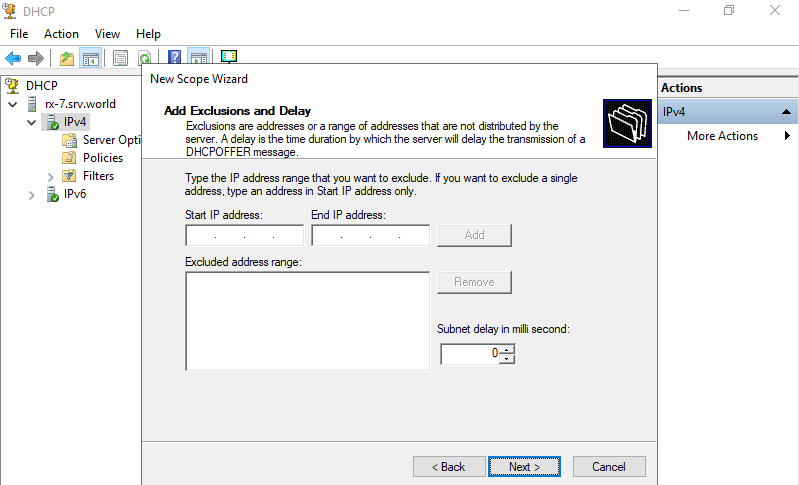
Step 11: If you’d like to exclude specific IP addresses from the range set in previous section, Configure it on here.
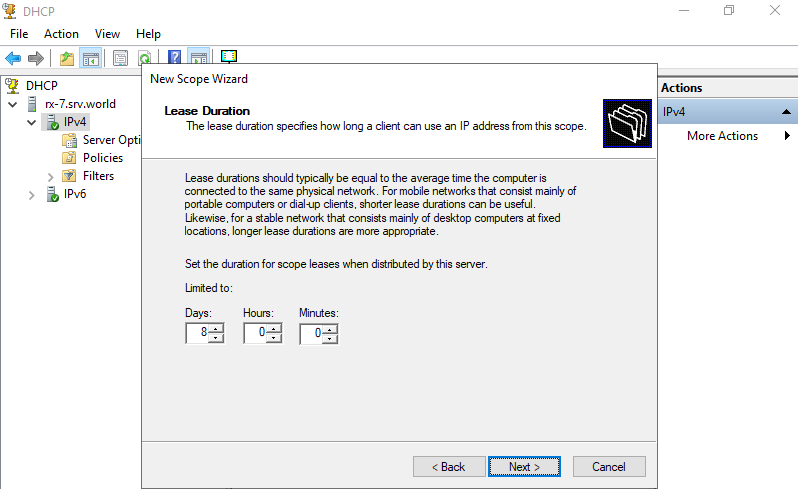
Step 12: Input lease duration.
Step 13: Click Next button.

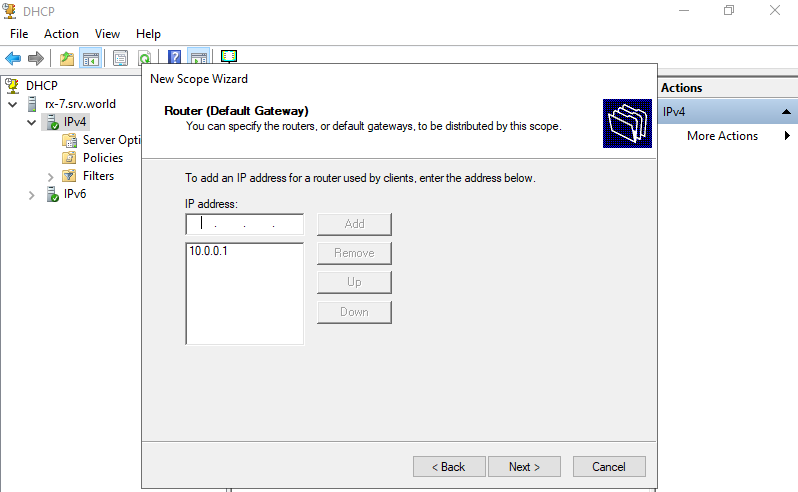
Step 14: Input default gateway of your network.
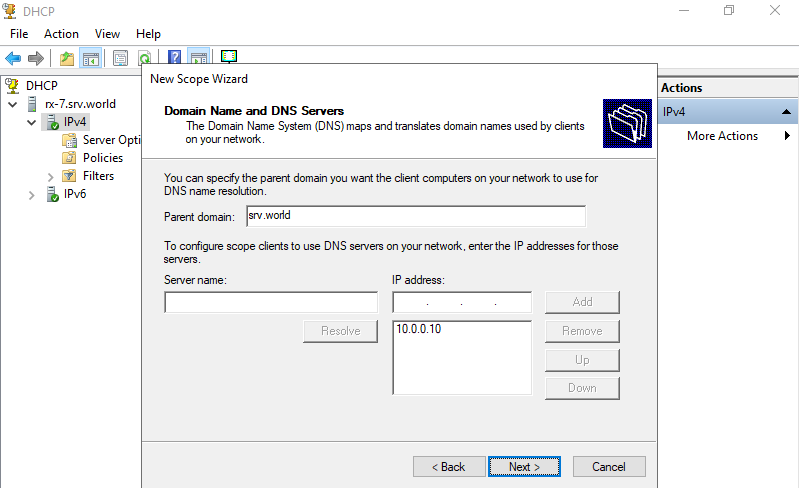
Step 15: Input Domain name and DNS server of your network.
If your Server is in AD Domain, it set automatically, make sure it and proceed next.
Step 16: Input WINS Server. It’s OK to keep empty here if you don’t need it.
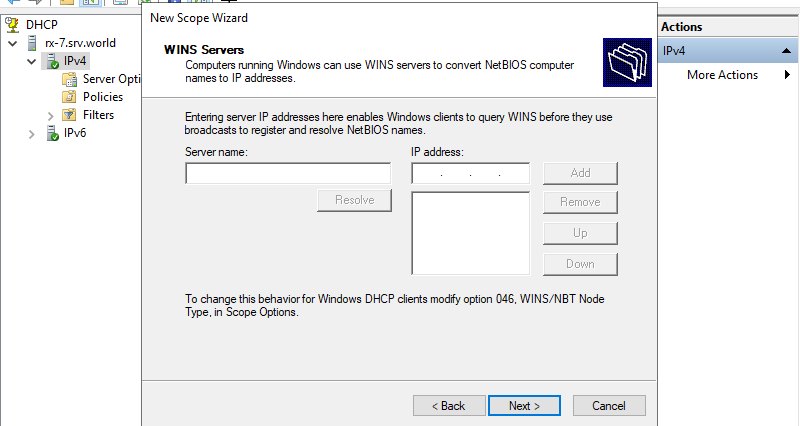
Step 17: Click Next button.
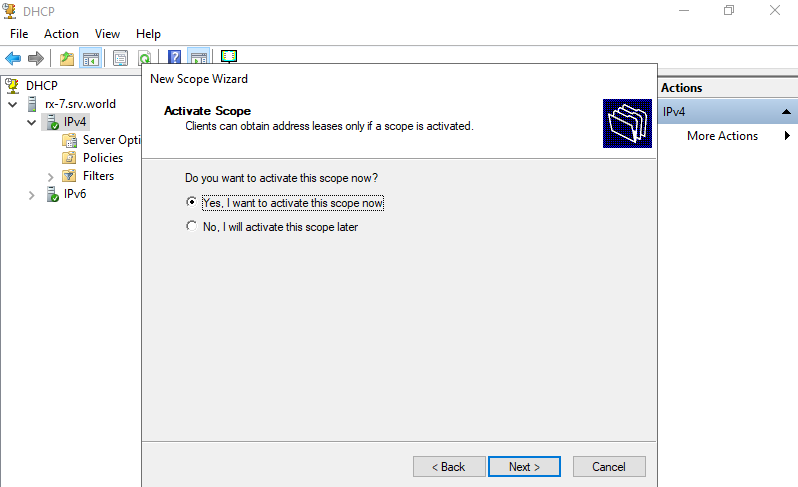
Step 18: Click Finish button to complete configuration.
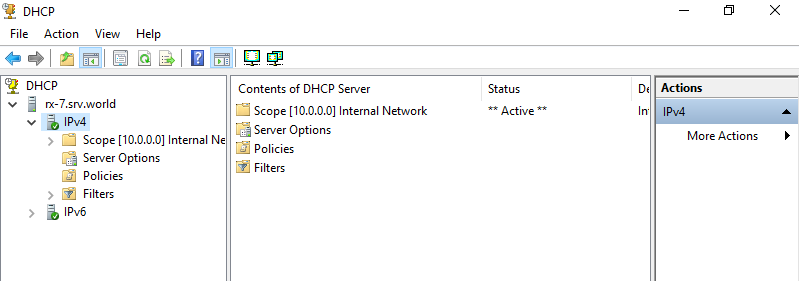
Step 19: New DHCP Scope has been added.
Configure DCHP Client
Configure DHCP Client. This example is based on Windows 10. On this example, it shows only the case for IPv4 configuration.
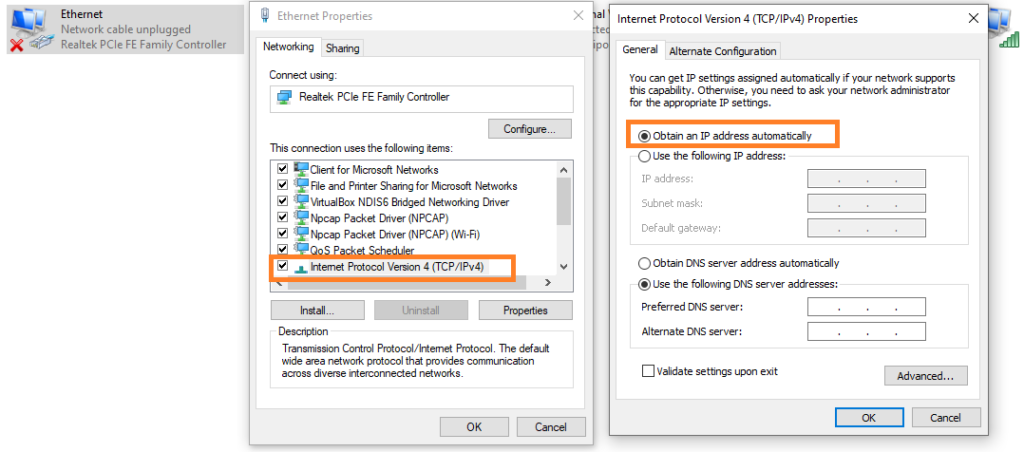
Step 1: Open Network settings and then, select TCP/IPv4 and click Properties button.
Control Panel\Network and Internet\Network Connections
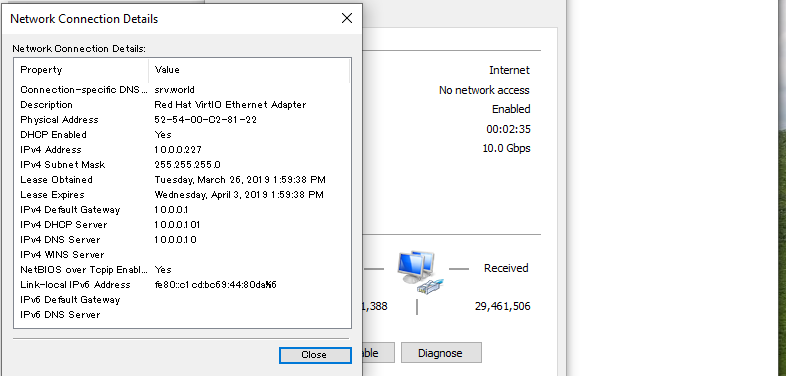
Step 2: Set like follows to assign IP address from DHCP server.
Step 3: After re-configuration of networking, IP address is assigned from DHCP Server.