
When you upgrade your computer to a new version of Windows 10, or you install a preview build, the installation process saves a copy of the previous version in the “Windows.old” folder.
This is part of the safety mechanism in case the upgrade process goes wrong. If the installation fails for any reason, the system can use the Windows.old older to undo the changes. Also, if the upgrade completes successfully, the backup copy of the previous version will be kept to provide the option to rollback in the case the new installation is causing issues.
Although this is a handy feature, if your computer is working correctly after the upgrade, you can safely delete the Windows.old folder to reclaim gigabytes of space. In this Windows 10 guide, we’ll walk you through the different ways that you can get rid of the Windows.old folder to free up several gigabytes of space to store more important files.
- Delete the Windows.old folder using Storage sense settings
- Delete the Windows.old folder using Temporary files settings
- Delete the Windows.old folder using Disk Cleanup
📌 How to delete the Windows.old folder using Storage sense settings
The easiest method to delete the Windows.old folder from your device is to use the Storage sense with these steps:
Open Settings.
Click on System.
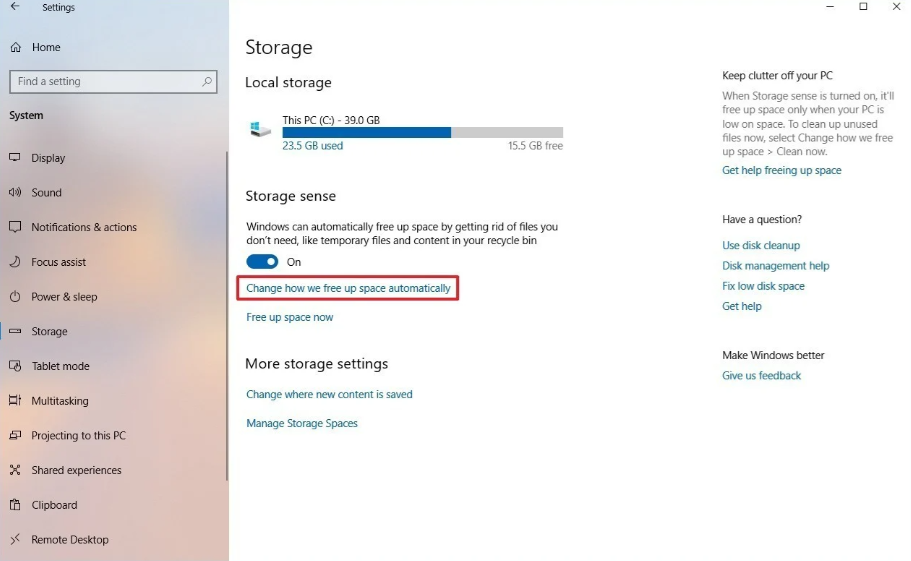
Click on Storage.
Under the “Storage sense” section, click the Change how we free up space automatically option.
Under the “Free up space now” section, check the Delete previous version of Windows option.
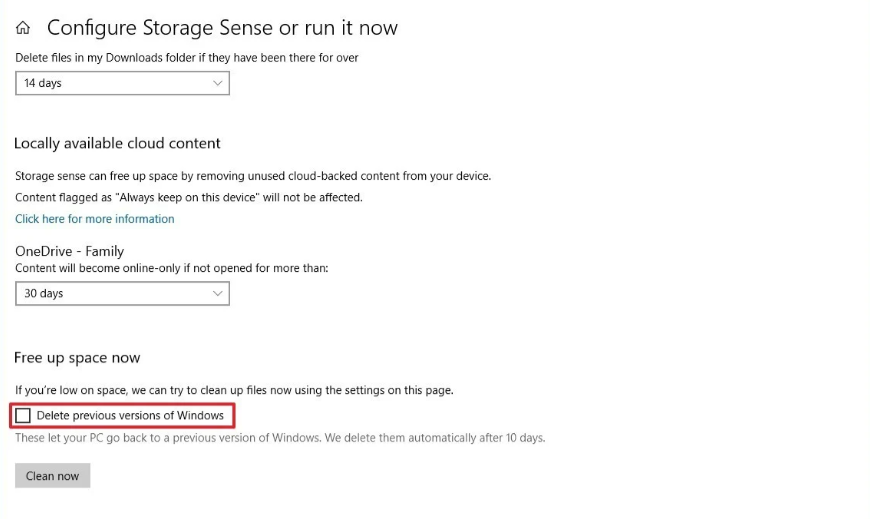
Click the Clean now button.
Once you’ve completed the steps, the folder with the previous installation of Windows 10 will no longer be available on your device.
📌 How to delete the Windows.old folder using Temporary files settings
Alternatively, using the Settings app, you can delete the Windows.old folder using the Temporary files settings with these steps:
Open Settings.
Click on System.
Click on Storage.
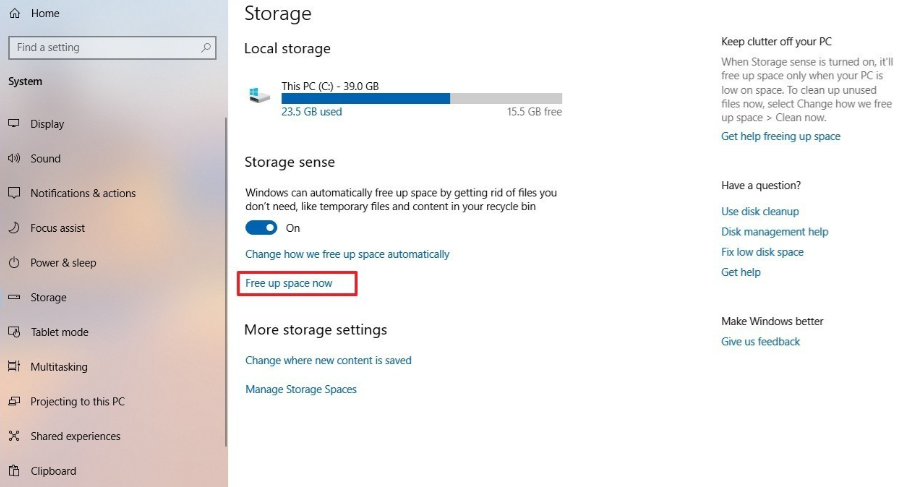
Under the “Storage sense” section, click the Free up space now option.
Check the Previous Windows installation(s) option.
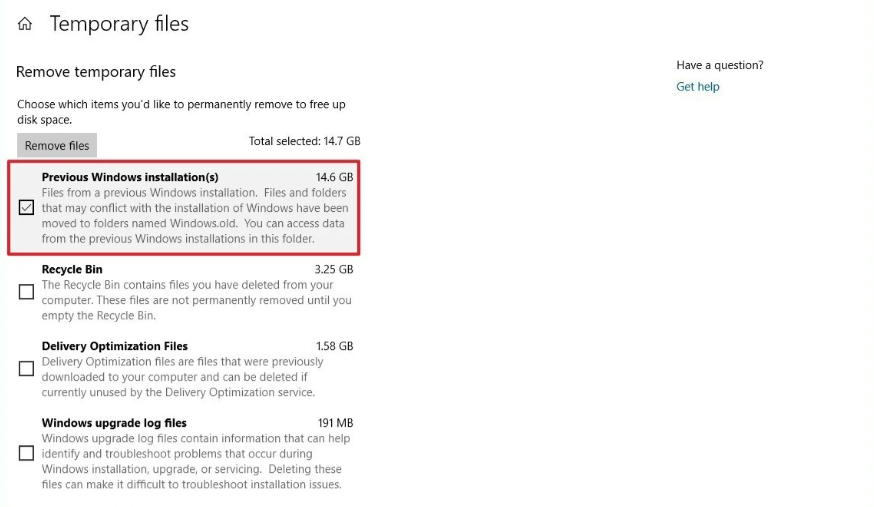
(Optional) Clear the default selected options if you only want to remove the Windows.old folder to free up space.
Click the Remove files button.
After completing the steps, the folder with the previous installation of Windows 10 will be removed freeing up 14GB to 20GB of storage space on your primary hard drive.
📌 How to delete the Windows.old folder using Disk Cleanup
You can also delete the Windows.old folder using the legacy Disk Cleanup tool with these steps:
Open File Explorer.
Click on This PC from the left pane.
Under the “Devices and drives” section, right-click the drive with the Windows 10 installation (usually the C drive) and select the Properties option.
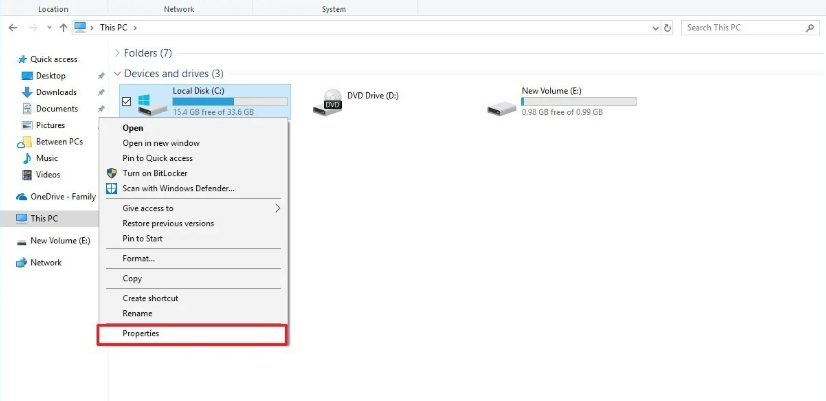
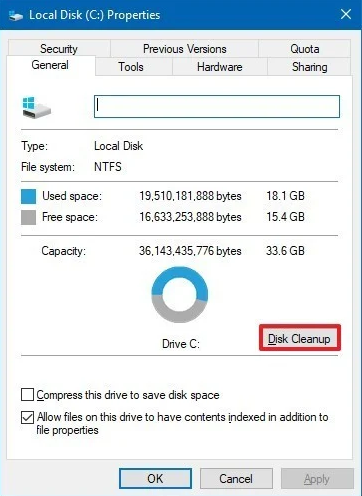
In the “General” tab, click the Disk Cleanup button.
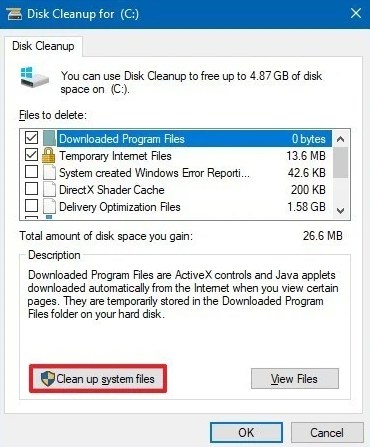
Click the Cleanup system files button.
Check the Previous Windows installation(s) option.
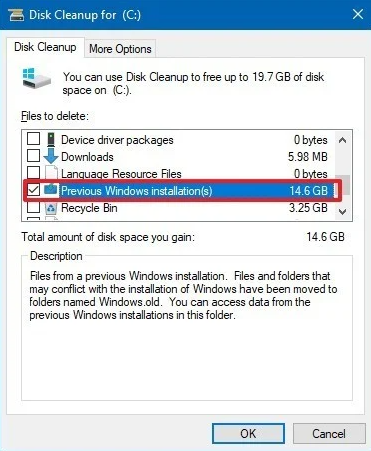
(Optional) Clear the default selected options if you only want to remove the Windows.old folder to free up space.
Click the OK button.
Click the Delete Files button to confirm the deletion.
Click the Yes button to confirm the warning.
Once you’ve completed the steps, the Windows.old folder will be removed from your device.